
Introduction to Cranberry Cake
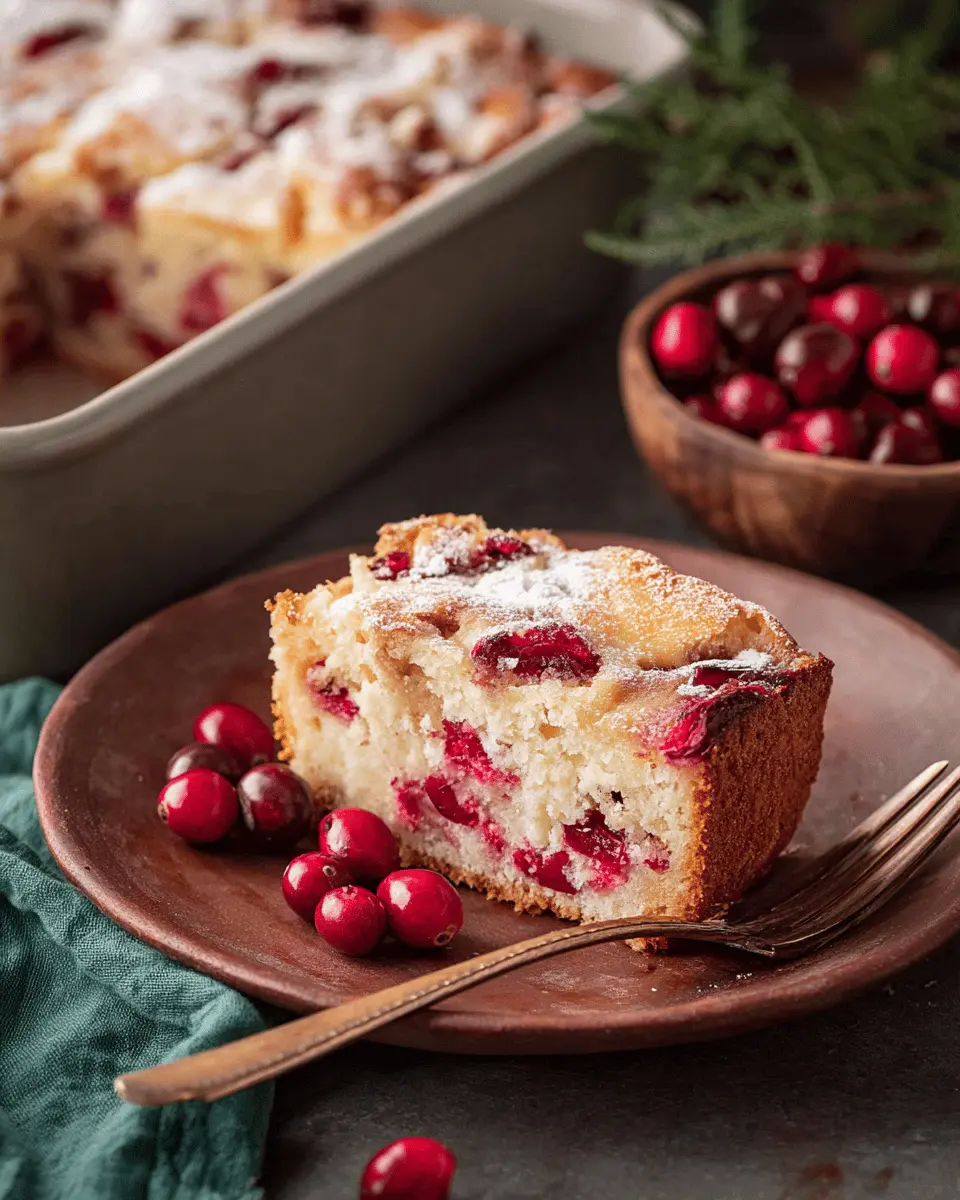
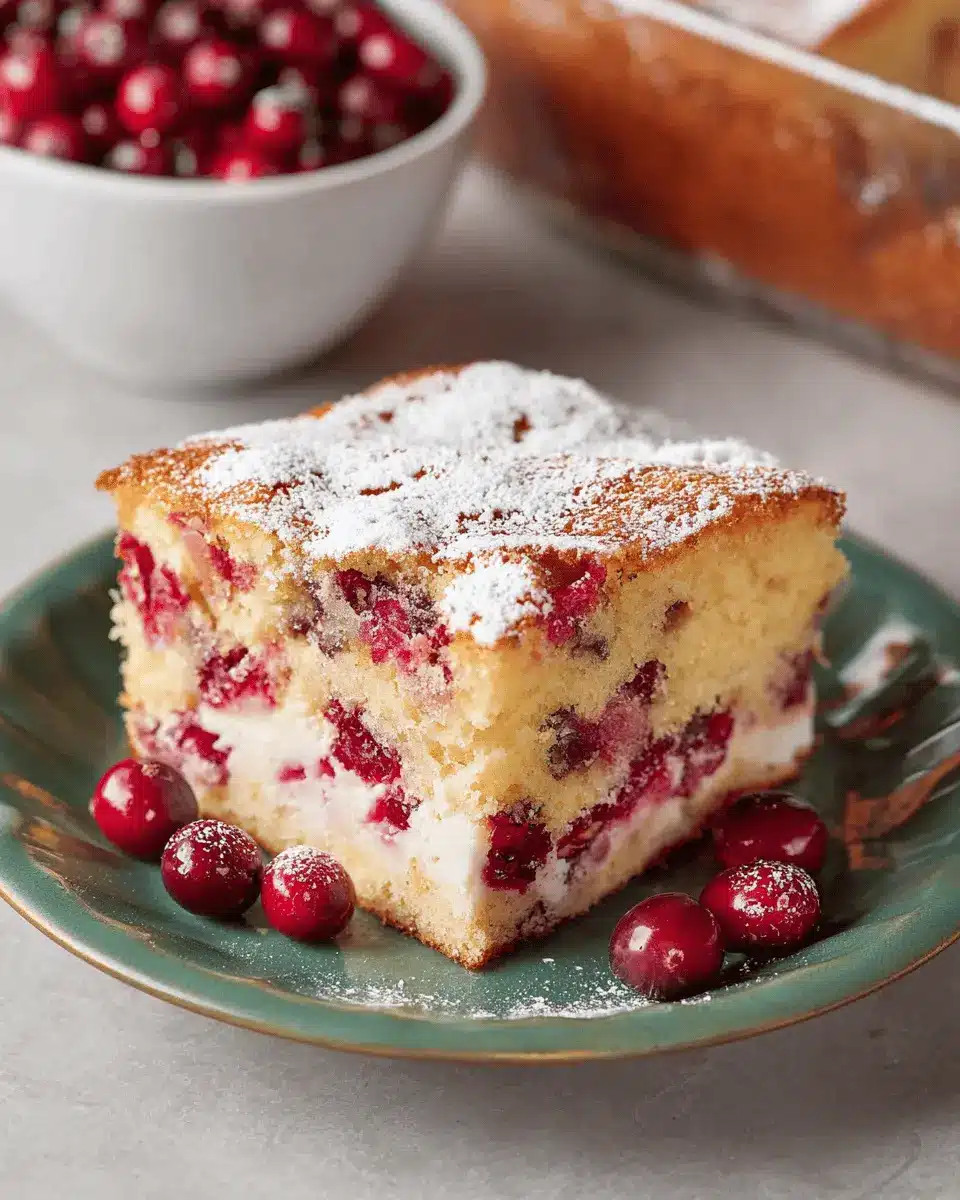
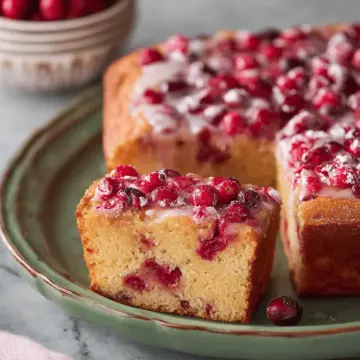
Cranberry cake is more than just a dessert; it’s a delightful experience that combines a tender, buttery crumb with the tart pop of juicy cranberries. This cake stands out for its simplicity and the way it captures the essence of the season. Fresh or frozen cranberries bring a vibrant color and a refreshing zing, making each slice a perfect blend of sweetness and tang.
What makes cranberry cake a delightful treat? It’s all about balance. The sweetness of the cake contrasts beautifully with the tartness of the berries, leading to a flavor profile that’s both comforting and exciting. Perfect for gatherings, this cake not only appeals to your taste buds but also becomes a conversation piece at holiday celebrations or casual get-togethers.
Moreover, cranberry cake is surprisingly easy to make. With just a few ingredients and minimal prep time, you can whip up a crowd-pleaser that looks as good as it tastes. It pairs wonderfully with a cup of hot tea or non-alcoholic drinks like apple cider or herbal tea, enhancing the cozy feel of your festive gatherings.
For a detailed recipe and tips on achieving the perfect texture, hop over to our full cranberry cake recipe!

Ingredients for Cranberry Cake
Essential Ingredients for a Perfect Cranberry Cake
Creating a delicious cranberry cake starts with some key ingredients that will ensure a moist and flavorful result. Here’s what you need:
- 4 large eggs: Make sure they're at room temperature for better mixing.
- 2⅔ cups sugar: This will contribute a delightful sweetness.
- 1 cup unsalted butter: Softened butter adds richness throughout the cake.
- 2 teaspoons vanilla extract: This enhances the overall flavor profile beautifully.
- ½ teaspoon salt: Balances the sweetness and elevates flavors.
- 2¾ cups + 2 tablespoons flour: Proper flour measurement is crucial; weigh it if you can.
- 1 teaspoon baking powder: This helps the cake rise.
- ⅓ cup whole milk: Adds moisture for a tender texture.
- 12 ounces fresh cranberries: These will bring that tartness that perfectly balances the sweetness.
Optional Ingredients and Add-Ons for Flavor
Want to elevate your cranberry cake? Consider adding some optional ingredients to enhance the taste:
- Zest of an orange: Adds a bright citrus note.
- Chopped walnuts or pecans: For a crunchy texture.
- Spices like cinnamon or nutmeg: Provides warmth and depth of flavor.
- Cream cheese frosting: A rich topping that pairs wonderfully with the tartness of cranberries.
These small tweaks can add up to a personalized cake that will impress friends and family. For more culinary inspiration, check out resources like the Joy of Cooking for classic techniques!
Preparing Cranberry Cake
Making a delightful cranberry cake is a fantastic way to showcase the tartness of cranberries, especially during the holiday season. Here, we’ll walk through the preparation process step-by-step, ensuring your cake comes out perfect every time!
Prepare Your Baking Equipment
Before diving into the ingredients, it’s essential to gather your baking tools to streamline the process. You will need:
- A 9x13-inch baking pan
- A handheld electric mixer or stand mixer with a whisk attachment
- Parchment paper (optional, but it helps in removing the cake later)
- Non-stick spray or butter for greasing
Preheat your oven to 350°F (175°C) as you prep your ingredients. This ensures your cake will bake evenly as soon as the batter is ready. If you prefer a fuss-free release, line your baking pan with parchment paper after greasing it.
Mix the Eggs and Sugar
Next, let's focus on the star of the cake: the batter. In a large mixing bowl or the bowl of your stand mixer, combine the eggs and sugar. Beat them together on medium speed for about 4 to 5 minutes until the mixture turns a lovely pale yellow, nearly doubling in volume. This step is essential for creating a light and fluffy texture, so don’t rush! The mixture should form ribbons on the surface, showing that you've whipped in enough air.
Incorporate the Butter and Dry Ingredients
Now it’s time to introduce the butter, vanilla extract, and salt into your mixture. Continue mixing for about 1 to 2 minutes until everything is well-combined. Your mixture may look slightly curdled, but don’t fret—the next stages will bring it all together!
In a separate medium bowl, whisk together the flour and baking powder. Begin to add this dry mixture to the batter, folding it in gently. Then, add in the milk for moisture. Be careful not to overmix; you want a tender cake, not a tough one!
Fold in the Cranberries
Now, the fun part! Toss your fresh cranberries in the remaining flour to prevent them from sinking in the batter, and gently fold them into the mixture. Aim for about 5 or 6 folds—this will help keep the cranberries intact and evenly distributed throughout the cake.
Bake to Perfection
Once your batter is ready, dollop it into the prepared baking pan, smoothing it into an even layer. If desired, sprinkle some extra sugar on top to give it a lovely caramelized finish. Bake your creation for about 50 to 55 minutes, or until a toothpick inserted into the center comes out clean. Remember to let it cool before you serve.
By following these steps, you're well on your way to delighting everyone with a beautifully baked cranberry cake that’s sure to be the highlight of any gathering! Want more dessert ideas? Check out Baker’s Journal for inspiration.
Variations on Cranberry Cake
Orange Cranberry Cake for a Citrus Twist
If you’re looking to add a refreshing twist to your cranberry cake, try incorporating orange zest and juice into the batter. The vibrant citrus flavor complements the tartness of the cranberries beautifully. Simply replace some of the liquid in your recipe with fresh orange juice and mix in a tablespoon or two of zest. This bright addition is perfect for elevating a traditional favorite. By the way, if you're curious about more citrus-infused desserts, this article offers some delightful combinations!
Gluten-Free Cranberry Cake Options
For those who need or prefer gluten-free options, you can easily substitute all-purpose flour with a gluten-free blend. Look for one containing xanthan gum, which helps bind the ingredients while ensuring a moist texture. Additionally, you might consider almond flour for a nutty flavor that complements the tart cranberries. By including gluten-free options, you can ensure that everyone can enjoy this festive cranberry cake during your holiday gatherings! Want more gluten-free baking tips? Check out King Arthur Baking's guide.
Baking Notes for Cranberry Cake
Tips for Avoiding a Dry Cranberry Cake
To ensure your cranberry cake turns out moist and delicious, be mindful of your flour measurements. Weighing your flour is the best practice for accuracy. If you don’t have a scale, remember to fluff your flour before spooning it into your measuring cup—this simple step will help you avoid packing in too much. Additionally, avoid overmixing the batter once you add the flour; doing so can develop gluten and lead to a tougher texture.
How to Ensure Cranberries Stay Intact
To keep your cranberries whole and bursting with flavor, toss them in a sprinkle of flour before adding them to the batter. This little trick helps them stay suspended in the cake rather than sinking or bursting during mixing. When folding them into the batter, aim for gentle motions—just a few strokes should do the trick! By treating your cranberries with care, they will retain their juicy pop in every slice.
For further reading on baking tips, check out The Kitchn’s baking basics. Happy baking!
Serving suggestions for Cranberry Cake
Pairing with whipped cream or ice cream
Serving your Cranberry Cake with a dollop of whipped cream or a scoop of vanilla ice cream elevates this delightful dessert to new heights. The creamy texture contrasts beautifully with the tartness of the cranberries, creating a balanced flavor profile. For an extra touch, consider drizzling a bit of caramel sauce or adding a sprinkle of cinnamon on top for warmth.
Creative plating ideas for gatherings
Impress your guests with attractive plating! Cut the Cranberry Cake into perfectly sized squares and place them on a tiered cake stand for a stunning display. Garnish each piece with fresh cranberries or a mint sprig for a pop of color. Don’t forget to serve it with a side of homemade cream cheese frosting or a fruity compote for a fun twist! For more serving inspiration, check out this guide on dessert plating.
Tips for Perfect Cranberry Cake
Importance of Using Room Temperature Ingredients
Using room temperature ingredients is crucial for achieving that luxuriously tender texture in your cranberry cake. Cold eggs and butter don’t incorporate well, leading to a denser cake. Aim to let your eggs and butter sit at room temperature for about 30 minutes before starting. It may seem like a small step, but trust me, the difference in texture is well worth the wait!
Best Practices for Measuring Flour
When it comes to measuring flour for your cranberry cake, precision is key. Avoid packing it into your measuring cup, as this can lead to using too much flour, resulting in a dry cake. Instead, use a scale for accuracy. If you don’t have one, fluff the flour with a spoon, lightly scoop it into your measuring cup, and level it off with a knife. This simple method helps you achieve the right flour-to-liquid ratio, ensuring your cake turns out just right!
Time details for Cranberry Cake
Preparation Time
Get ready to whip up your delicious cranberry cake in just 15 minutes! Gather your ingredients and preheat your oven while you measure and mix everything together for a smooth, efficient start.
Baking Time
Allow the cake to bake for approximately 50 to 55 minutes. This is the perfect time to tidy up the kitchen or enjoy a quick break while the heavenly aroma fills your home.
Total Time
In about 1 hour and 5 minutes, you'll have a scrumptious cranberry cake ready to serve. It’s a quick and rewarding way to impress your friends and family at gatherings!
By the way, for some expert baking tips and creative variations, check out thekitchn.com for additional inspiration. Enjoy baking!
Nutritional Information for Cranberry Cake
Calories
Each slice of this delightful cranberry cake contains approximately 454 calories. It's a delicious way to indulge, especially during festive gatherings!
Protein
With 6 grams of protein per serving, this cake offers a bit of nourishment alongside its sweet flavor. Ideal for balancing out your dessert!
Sugar Content
The cake has a sugar content of 46 grams, which comes from both the added sugar and the natural sweetness of cranberries. Enjoying this treat in moderation is key to savoring its deliciousness while managing your sugar intake.
For more information on balancing your desserts with healthy choices, check out The American Heart Association for tips!
FAQs about Cranberry Cake
Can I use frozen cranberries?
Absolutely! Using frozen cranberries in your cranberry cake is perfectly fine. Just remember to toss them with a bit of flour before folding them into the batter. This helps prevent them from sinking to the bottom and ensures even distribution throughout the cake. If you notice the frozen cranberries are a bit too icy, let them thaw slightly before using.
What is the best way to store leftover cranberry cake?
To keep your leftover cranberry cake fresh, store it in an airtight container at room temperature for up to three days. If you want to extend its life, refrigerate it for up to a week. You can also freeze the cake—wrap it well in plastic wrap and then foil for up to three months. Just thaw it overnight in the fridge before serving!
How can I make this recipe healthier?
You can easily lighten up your cranberry cake by making a few simple swaps. Consider:
- Replacing butter with unsweetened applesauce.
- Using whole wheat flour instead of all-purpose flour for added fiber.
- Reducing the sugar by a third, or experimenting with natural sweeteners like honey or maple syrup.
For more tips on making healthy substitutions in baking, check out The American Heart Association. Enjoy your deliciously healthier cranberry cake!
Conclusion on Cranberry Cake
In summary, cranberry cake is the perfect dessert to impress your guests this holiday season. Its delightful tartness, paired with a moist crumb, makes it a standout choice. Whether served warm or cold, this cake is sure to be the highlight of your celebration. Enjoy every delicious bite!
Cranberry Cake
Equipment
- 9x13-inch pan
- Handheld electric mixer or stand mixer with whisk attachment
- Parchment paper, optional
- Non-stick spray
Ingredients
- 4 large eggs room temperature
- 2.67 cups sugar (534g)
- 1 cup unsalted butter cubed and softened (236g)
- 2 teaspoons vanilla extract
- 0.5 teaspoon salt
- 2.75 cups flour divided (345g)
- 1 teaspoon baking powder
- 0.33 cup whole milk room temperature (80mL)
- 12 ounces fresh cranberries (340g)
Instructions
- Preheat the oven to 350°F. Grease a 9x13-inch baking pan with butter or baking spray. Line it with parchment paper. (This is optional, but makes it easier to remove the cake and serve).
- In the bowl of a stand mixer fitted with the whisk attachment (or a large bowl using a handheld electric mixer), combine the eggs and sugar. Beat on medium speed (level 6) for 4 to 5 minutes until the mixture is very pale yellow or off-white in color, nearly doubled in volume, and creates thick ribbons on the surface of the mixture when drizzled.
- Add the butter, vanilla, and salt and beat on medium speed for 1 to 2 minutes until combined.
- In a medium bowl, whisk to combine 2¾ cups (330g) flour and baking powder.
- Add one-half of the flour mixture to the batter and gently fold to combine. Add the milk and stir gently to combine. Fold in the remaining flour mixture.
- Toss the cranberries with the remaining 2 tablespoons (15g) flour. Gently fold the cranberry mixture into the batter.
- Dollop the batter evenly all over the base of the prepared 9x13-inch baking pan. Spread gently into an even layer. Sprinkle the top with an additional 2 tablespoons of granulated sugar if you like.
- Bake for about 50 to 55 minutes until a toothpick inserted in the center comes out clean. Let the cake cool completely in the pan before serving.
Leave a Reply