
Introduction to French Bread Rolls
Why French Bread Rolls are perfect for young professionals
As a young professional, your life can often feel like a whirlwind. Between juggling work deadlines, social commitments, and personal interests, finding time to prepare homemade meals can feel overwhelming. Enter French bread rolls! These delightful little gems are an excellent solution for anyone looking to impress at dinner parties or simply enjoy a comforting homemade treat.
With a prep time of under three hours (most of which is hands-off rising time), French bread rolls make it easy to elevate any meal. Whether served alongside a hearty soup, a Mediterranean-style platter, or enjoyed with a slather of butter, these rolls can truly transform your dining experience.
Moreover, they are adaptable. You can customize them by incorporating herbs, garlic, or even different flours to suit your tastes. Plus, they freeze beautifully, allowing you to whip out a few rolls whenever you have unexpected guests or need a quick snack. According to experts, homemade bread has better flavor and nutrition compared to store-bought options, bringing a touch of joy to your busy life.
If you're ready to wow your friends and family with your baking skills, these French bread rolls are the perfect starting point!
Ingredients for French Bread Rolls
Essential Ingredients for the Perfect Roll
Creating the perfect French Bread Rolls starts with a handful of key ingredients that work together to yield soft, fluffy rolls with a delightful crust. Here’s what you'll need:
- Warm Water: 1 ½ cups at about 105 to 110 degrees F helps activate the yeast.
- Yeast: 1 tablespoon of instant or active dry yeast will give your dough the rise it needs.
- Sugar or Honey: Just 2 tablespoons will not only sweeten the rolls but also nourish the yeast.
- Oil: Use 2 tablespoons of canola, vegetable, or olive oil for moisture and flavor.
- Salt: 1 teaspoon enhances the overall taste.
- Flour: 3 ½ to 4 cups of all-purpose or bread flour create the structure, adjusting as necessary for your dough consistency.
Alternative Ingredients to Consider
If you’re looking to switch things up, consider these alternatives for your French Bread Rolls:
- Flours: Trying whole wheat or a gluten-free blend can add a unique flavor and texture.
- Sweeteners: Substitute the granulated sugar for brown sugar or maple syrup for a deeper sweetness.
- Oils: Avocado or coconut oil can impart interesting flavors and health benefits.
- Herbs and Spices: A sprinkle of garlic powder or dried herbs can elevate your rolls far beyond the traditional!
Experimenting with these alternatives can tailor your rolls to your taste or dietary needs. Curious about flour types? Learn more here for expert insights!
Step-by-step Preparation of French Bread Rolls
Gather your ingredients
Before diving into the world of baking, let's make sure you have everything you need to create your French bread rolls. You'll want to gather the following ingredients:
- 1 ½ cups warm water (around 105 to 110 degrees F)
- 1 tablespoon instant or active dry yeast
- 2 tablespoons granulated sugar or honey
- 2 tablespoons of oil (canola, vegetable, or olive)
- 1 teaspoon table salt
- 3 ½ to 4 cups all-purpose or bread flour
Having everything at your fingertips will streamline the process and keep the vibe relaxed. Pro tip: Measuring your ingredients beforehand can help you maintain a rhythm while you mix and knead!
Mixing the dough
In a stand mixer with a dough hook or a large bowl, combine the warm water, yeast, sugar, oil, salt, and 2 cups of flour. Start mixing until everything is blended. Gradually incorporate the remaining flour, watching the dough transform as it pulls away from the bowl’s sides. If you're curious about how the dough should feel—you're aiming for a slightly tacky, smooth texture. This mixture will lay the foundation for your delightful rolls.
Kneading techniques for the perfect texture
Now comes the fun part—kneading! You can knead your dough by hand or use a mixer. Aim for about 4 to 5 minutes in a stand mixer or 7 to 9 minutes by hand. Kneading develops the gluten, which gives your French bread rolls that chewy, airy quality we all love. If the dough becomes too sticky, sprinkle in a tablespoon or two of flour to achieve that perfect, non-sticky consistency.
The first rise – a crucial step
Once your dough is kneaded to perfection, transfer it to a lightly greased bowl and cover it. This initial rise is vital; let it rest until it doubles in size, typically 1 to 2 hours. The yeast will work its magic, creating air bubbles that will yield soft, fluffy rolls.
Shaping the rolls for uniformity
After the first rise, turn the dough out onto a lightly greased countertop. Divide it into 12 equal portions (each about 2.75 ounces), and shape them into round balls. Cupping the dough in your hand and spinning it will help achieve a smooth surface. It’s all about aesthetics here—uniform rolls not only look beautiful, but they also bake evenly!
The second rise – achieving the fluffiness
Place your shaped rolls in a lightly greased 9x13-inch pan or a half sheet pan, spacing them about ½ to 1 inch apart. Cover them loosely with a towel or plastic wrap. Let them rise for another 45 minutes to an hour; you want them to puff up and nearly double in size, which contributes to that delightful fluffiness.
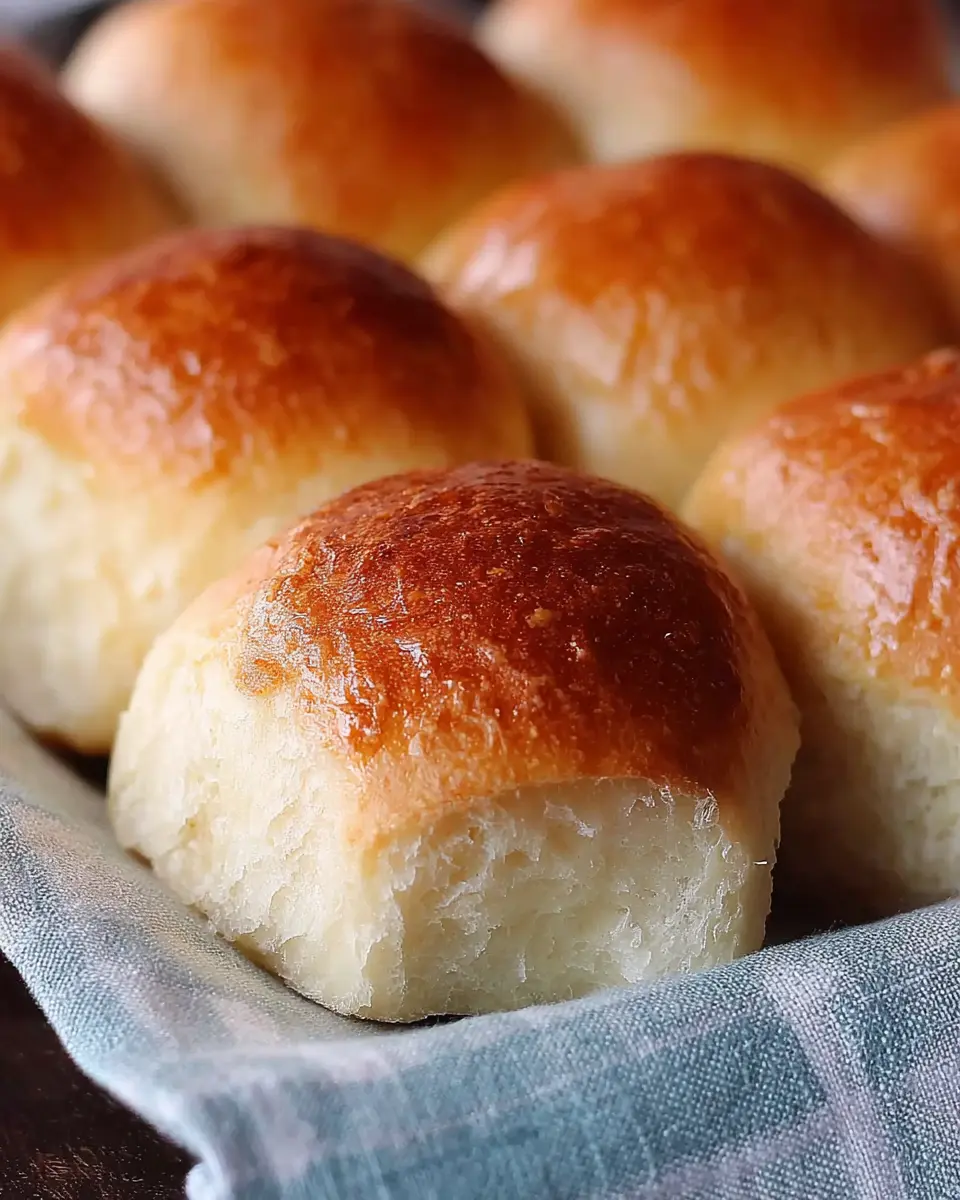
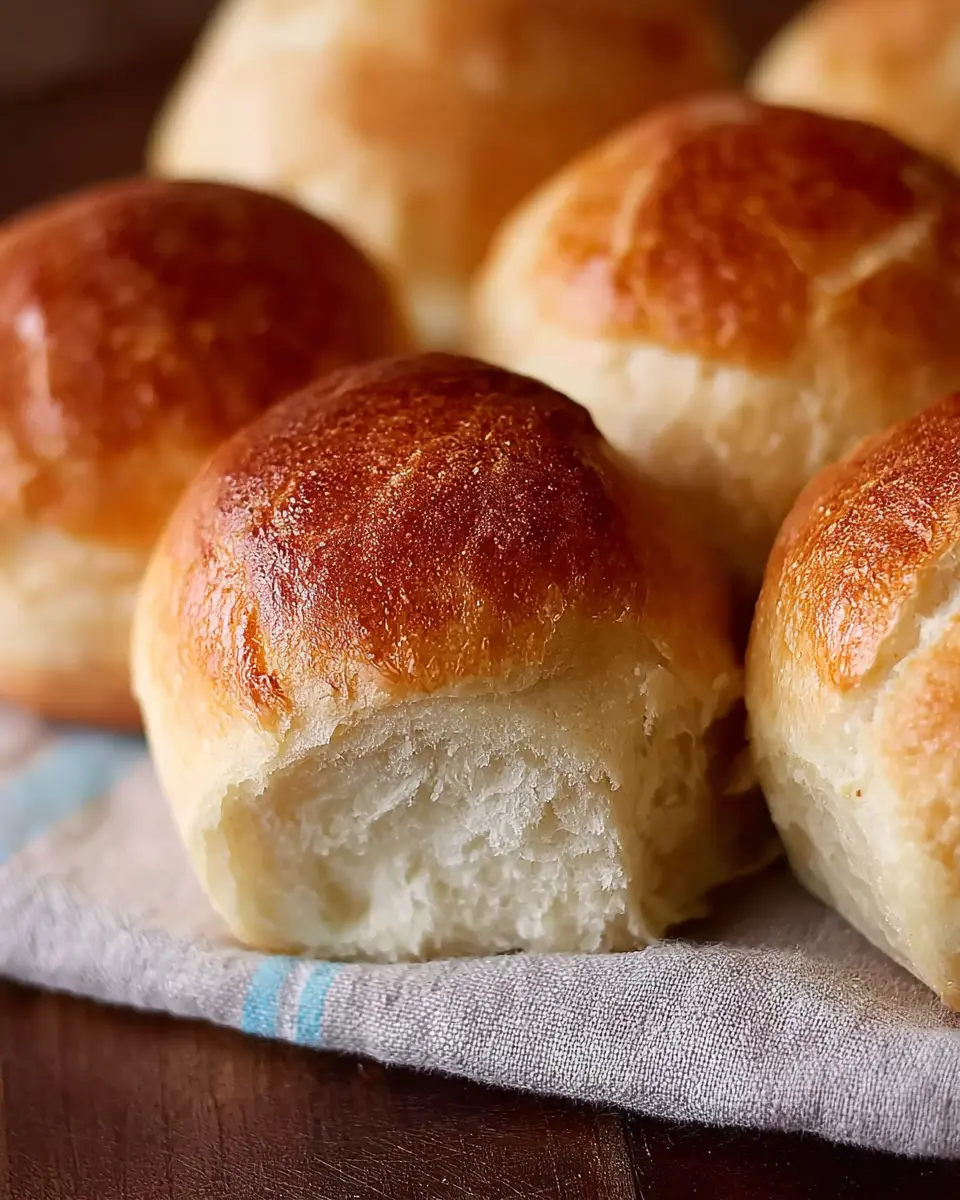
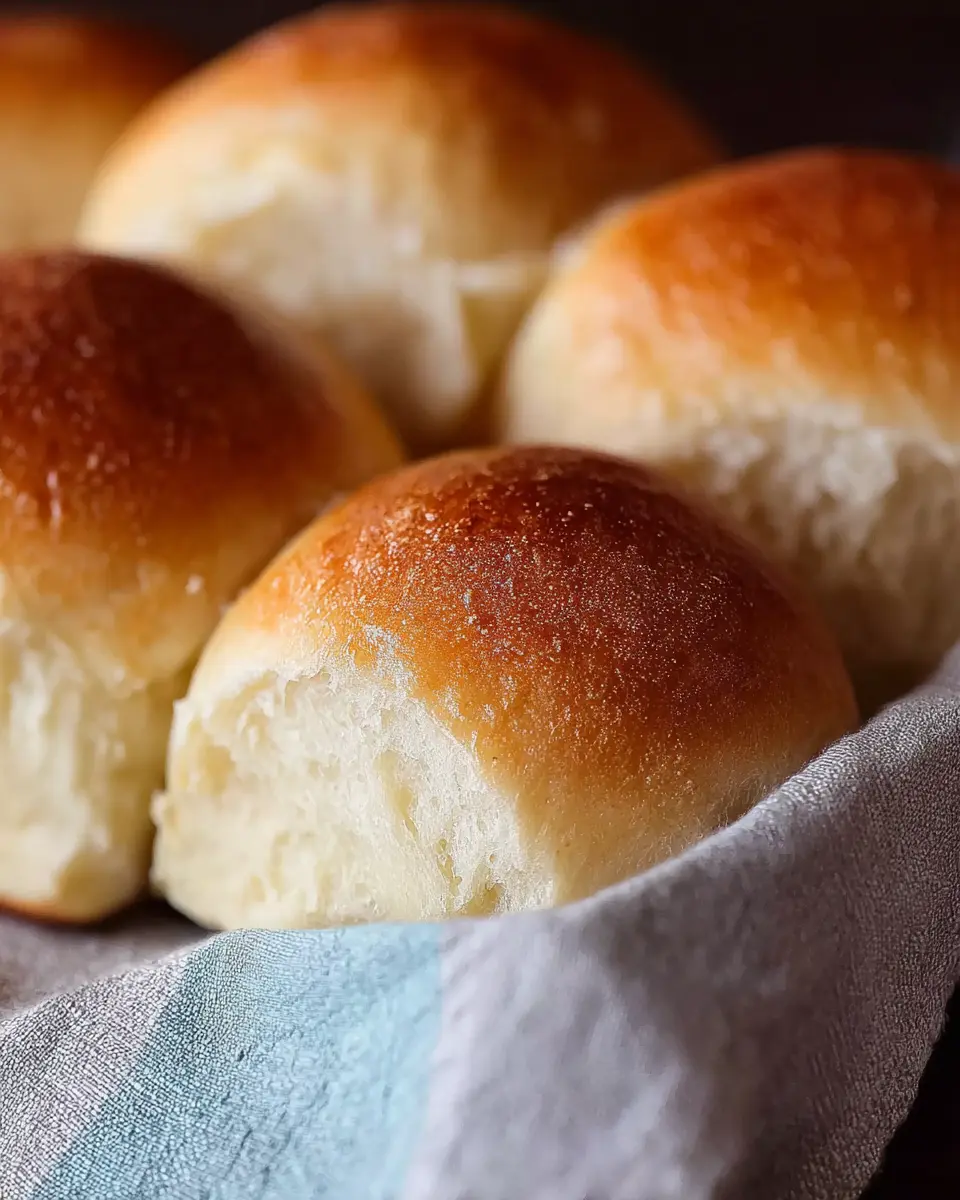
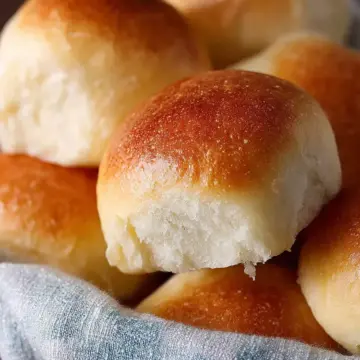
Baking the rolls to golden perfection
Preheat your oven to 400 degrees F (or 375 degrees if your oven runs hot). When the time comes, bake the rolls for 17 to 20 minutes until they're golden and beautiful. Remember to keep an eye on them! Once they’re out of the oven, a quick brush with butter will add that final touch. Serve them warm or at room temperature, and prepare for compliments!
For more baking tips and delicious recipes, check out resources from culinary experts like Serious Eats or King Arthur Baking. Enjoy the process and happy baking!
Variations on French Bread Rolls
Herb-infused French Bread Rolls
If you're looking to elevate your French Bread Rolls, why not infuse them with some fragrant herbs? Simply mix in your choice of finely chopped fresh rosemary, thyme, or oregano into the dough for a delightful twist. These herb-infused rolls pair beautifully with soups and salads, adding a touch of gourmet flair to your meal. Consider trying combinations like garlic and basil for an Italian twist!
Sweet Rolls with a Touch of Cinnamon
Want to satisfy your sweet tooth? Transform your classic French Bread Rolls into delightful cinnamon rolls! Just sprinkle a mixture of brown sugar and ground cinnamon over the rolled-out dough before shaping the rolls. For an irresistible finish, drizzle a simple icing of powdered sugar and milk on top once they're baked and cooled. These sweet rolls make for a perfect breakfast treat or afternoon snack.
For more inspiration, check out this guide on herb infusions and our top cinnamon roll techniques here. Happy baking!
Cooking Tips and Notes for French Bread Rolls
Tips for Mastering Yeast
To achieve the fluffiest French bread rolls, proper yeast management is crucial. If you're using active dry yeast, remember to give it a bit of warmth and sugar in your water before starting. Instant yeast can go straight in, making the process even simpler. Check the expiration date to ensure optimal performance — fresh yeast means better rises!
Adjusting for Different Altitudes and Climates
Baking can vary dramatically depending on where you live. If you're in higher altitudes, you may need to reduce the amount of flour and increase hydration for softer rolls. Conversely, in humid climates, your dough may require more flour. Always rely on how the dough looks and feels; it should be soft and slightly tacky.
For more tips on adjusting recipes based on climate, check out resources from King Arthur Baking. Happy baking!
Serving Suggestions for French Bread Rolls
Pairing with Homemade Soups and Salads
One of the best ways to enjoy French bread rolls is with a warm, hearty soup or a refreshing salad. Picture digging into a bowl of creamy tomato bisque or a rich chicken noodle soup, with the rolls there to soak up the deliciousness. For salads, try them alongside a vibrant Caesar or a Mediterranean quinoa salad for a delightful meal that satisfies.
Creative Spreads to Enhance Flavors
Elevate your French bread rolls by exploring various spreads that enhance their flavor.
- Herbed Butter: Mix softened butter with fresh herbs, garlic, or even a hint of lemon for a zesty touch.
- Hummus: A scoop of hummus—classical or roasted red pepper—adds a protein punch and creamy texture.
- Avocado Smash: Top with smashed avocado, sea salt, and chili flakes for a trendy, health-forward option.
With these pairings and spreads, your French bread rolls are sure to become the star of your dining table! For more inspiration on soups and salads, check out this collection on classic recipes.
Time Breakdown for French Bread Rolls
Preparation time
Get ready to bake! Spend about 25 minutes gathering your ingredients, mixing, and kneading the dough.
Rising time
Patience is key: allow 1 to 2 hours for the dough to rise. The warmer the environment, the quicker it will puff up!
Baking time
Once your rolls are beautifully risen, they’ll take about 17 to 20 minutes to become golden perfection in your oven.
Total time
In just under 2 hours and 45 minutes, you’ll be enjoying warm, homemade French Bread Rolls. Perfect for sharing or savoring all on your own!
For more tips on bread-making techniques, check out resources from King Arthur Baking or The Fresh Loaf, both excellent sources for helping elevate your baking skills!
Nutritional Facts for French Bread Rolls
Calories
Each of these delightful French Bread Rolls contains about 150 calories. This makes them a delightful addition to your meal without overly indulging your caloric intake.
Carbohydrates
Packed with flavor, a single roll contributes approximately 30 grams of carbohydrates. This energy boost can help fuel your day and keep you satisfied for longer.
Protein
While these rolls are primarily carb-centric, they do provide around 3 grams of protein each. Pair them with a protein-rich topping like Turkey Bacon or Chicken Ham to create a balanced meal!
For more nutritional information, check out resources like MyFitnessPal or NutritionData.
FAQs about French Bread Rolls
Can I freeze the rolls?
Absolutely! These French bread rolls freeze beautifully. Once they’re baked and cooled completely, place them in a resealable freezer bag, expelling as much air as possible. They can be stored in the freezer for about a month. When you're ready to enjoy them, simply let them thaw at room temperature or warm them in the oven for that fresh-baked feel.
What's the difference between active dry yeast and instant yeast?
Great question! While both types of yeast are effective for baking, instant yeast is more finely ground and can be added directly to your dough ingredients without needing to be dissolved first. Active dry yeast requires a bit more attention, often needing to be activated in warm water. If you're a beginner, instant yeast may be the way to go, as it simplifies the process.
How do I know when the rolls are done?
You’ll know your French bread rolls are perfectly baked when they turn a lovely golden brown on the outside and sound hollow when tapped on the bottom. Typically, the baking time is around 17 to 20 minutes, but ovens vary, so keep an eye on them as they near the finish line!
For more information on yeast types, check out this article from King Arthur Baking.
Conclusion on French Bread Rolls
The Joy of Homemade Rolls and the Satisfaction They Bring
Homemade French Bread Rolls are not just a recipe; they embody a delightful experience. The aroma fills your kitchen, reminding you of warm family gatherings. Each golden roll symbolizes effort and creativity, making every meal special. So go ahead, embrace this joy, and savor the satisfaction they bring!
French Bread Rolls {Step-by-Step}
Equipment
- Stand Mixer
- bowl
- baking pan
Ingredients
- 1.5 cups warm water (105 to 110 degrees F)
- 1 tablespoon instant or active dry yeast (see note)
- 2 tablespoons granulated sugar or honey
- 2 tablespoons canola oil, vegetable oil, or olive oil
- 1 teaspoon table salt
- 3.5 to 4 cups all-purpose or bread flour (497 to 569 g, more or less)
Instructions
- In the bowl of a stand mixer fitted with the dough hook or in a large bowl by hand, combine the warm water, instant yeast, sugar, oil, salt and 2 cups of the flour.
- Begin mixing, and continue to add remaining flour gradually until the dough has pulled away from the sides of the bowl.
- Knead the dough for 4 to 5 minutes in a stand mixer (7 to 9 minutes by hand). Add additional flour a tablespoon or two at a time only if the dough starts to cling to the sides of the bowl and is really sticky to the touch (see note below for clarification).
- Place the dough in a lightly greased bowl and cover. Let the dough rise until doubled, 1 to 2 hours.
- Turn the dough out onto a lightly greased countertop.
- Divide the dough into 12 equal pieces (about 2.75 ounces each, more or less), and form the dough into round balls by cupping your hand around the dough and spinning into a round shape, pinching the bottom to seal any rough edges, if needed.
- Place the rolls in a lightly greased 9X13-inch pan or on a lightly greased half sheet pan. Space the rolls about ½ to 1-inch apart.
- Cover the rolls loosely with a lightweight towel or greased plastic wrap and let the rolls rise until very puffy and nearly doubled, about 45 minutes to 1 hour.
- While the rolls rise, preheat the oven to 400 degrees F (if your oven bakes hot, preheat to 375 degrees F). Bake for 17 to 20 minutes until golden and baked through.
- Immediately out of the oven, brush with butter, if desired. Serve warm or at room temperature.

Leave a Reply