
Introduction to Cheesy Garlic Chicken Wraps
Why Cheesy Garlic Chicken Wraps are the Perfect Solution for Busy Young Professionals
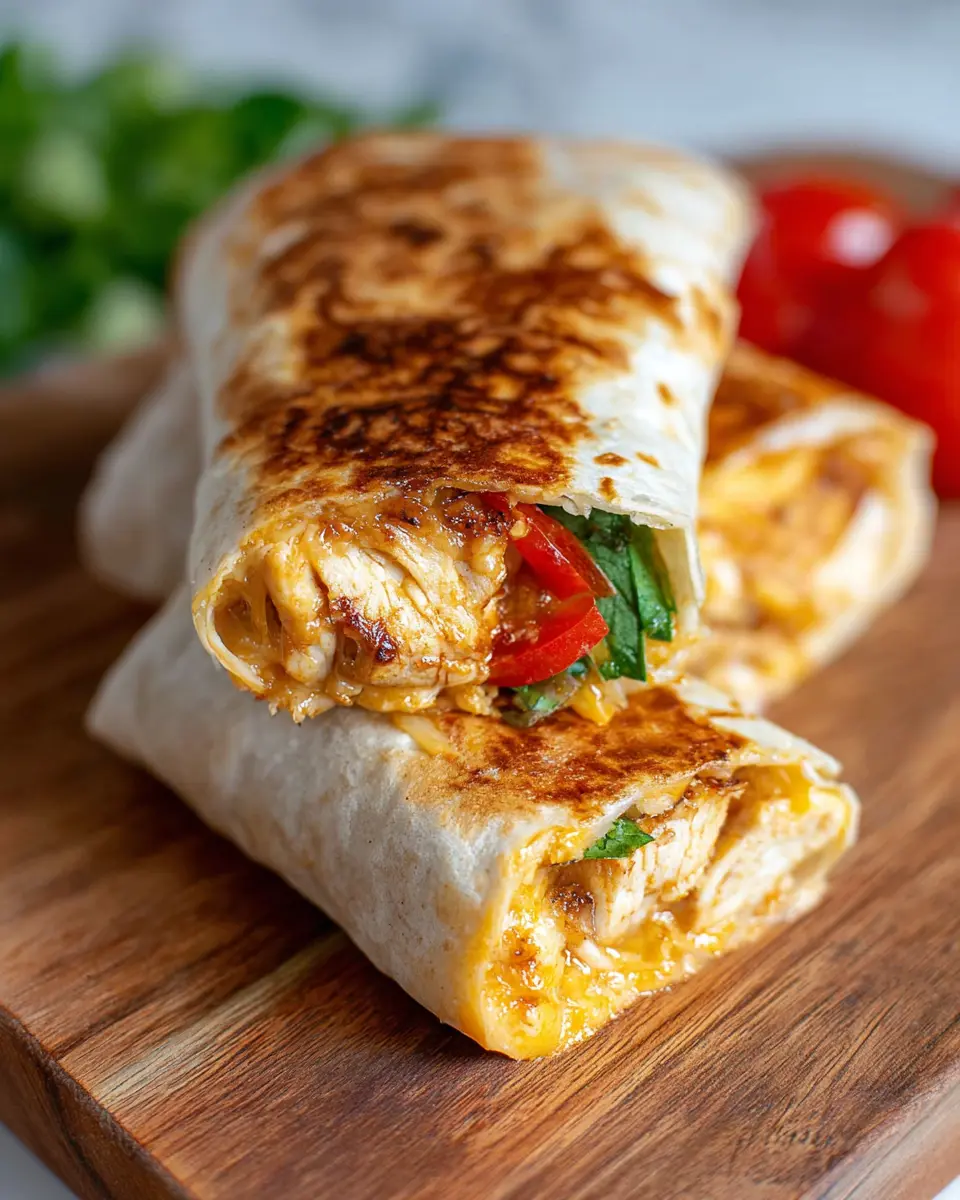
Are you a busy young professional constantly juggling work deadlines and social commitments? If so, Cheesy Garlic Chicken Wraps might just become your new favorite meal! These wraps are not only quick to prepare but also offer a delightful blend of flavors and textures that will satisfy even the pickiest of eaters.
In just 15 minutes of prep and 7 minutes of cooking, you can whip up a healthy, protein-packed lunch or dinner that doesn’t skimp on taste. Ideal for meal prep, you can easily make the filling in advance and have it ready to roll—how simple is that? The recipe utilizes cooked chicken, making it easier to include leftovers or a store-bought rotisserie option. This flexibility allows you to tailor the wraps to fit your dietary preferences while maximizing convenience.
Plus, with ingredients like garlic, cheese, and a kick of hot sauce, each bite is bursting with flavor. Need a side? Pair these wraps with a vibrant salad or roasted veggies for a satisfying meal. Get ready to treat yourself to an easy-to-make dish that’s as delightful to eat as it is to prepare!
Ingredients for Cheesy Garlic Chicken Wraps
Creating delicious Cheesy Garlic Chicken Wraps begins with gathering the right ingredients. Here’s what you’ll need to whip up this mouthwatering dish:
- Tortillas: Start with 2 large tortillas. You can use regular varieties or opt for low-carb or high-protein options to suit your dietary preferences.
- Cooked Chicken: About 7 oz (200 grams) of chopped cooked chicken is perfect. Rotisserie chicken works exceptionally well for a quick option!
- Garlic: 2 garlic cloves minced or grated. Feel free to adjust this based on how garlicky you like your wraps.
- Condiments: You’ll need 2 tablespoons of light mayonnaise and 1 tablespoon of light Greek yogurt for a creamy texture.
- Hot Sauce: Adding 2 teaspoons of hot sauce, such as Frank’s, brings an exciting kick to the chicken.
- Seasoning & Cheese: Don't forget ¼ teaspoon of salt and 3 oz (90 grams) of your favorite grated cheese—cheddar blends magnificently into the mix.
- Green Onion: A ¼ cup of chopped green onion adds a fresh finish to your wraps.
- Olive Oil Spray: Use this to crisp up your wraps in the pan.
These ingredients come together to create a delightful meal that’s both satisfying and easy to make! For more tasty variations, check out sources like EatingWell or The Kitchn.
Preparing Cheesy Garlic Chicken Wraps
Creating Cheesy Garlic Chicken Wraps is a delightful experience, yielding a mouthwatering dish that's perfect for any lunch or dinner. Let’s dive into the preparation steps to ensure your wraps come out perfectly every time!
Gather Your Ingredients
Before you start cooking, it’s essential to have all your ingredients ready. For these delicious wraps, you’ll need:
- 2 large tortillas (regular or low-carb/high-protein)
- 7 oz cooked chicken (about 200 grams, chopped—rotisserie chicken works wonderfully!)
- 2 garlic cloves (minced or grated, adjust based on your love for garlic)
- 2 tablespoons light mayonnaise
- 1 tablespoon light Greek yogurt or plain yogurt
- 2 teaspoons hot sauce (like Frank’s for a little kick)
- ¼ teaspoon salt
- 3 oz grated cheese (about 90 grams—go for a cheddar blend for optimum gooeyness)
- 1 green onion (chopped)
- Olive oil spray
Having everything on hand makes the assembly so much smoother. Plus, it's a fantastic opportunity to try out different cheese blends or even spices for added flavor.
Mix the Chicken Filling
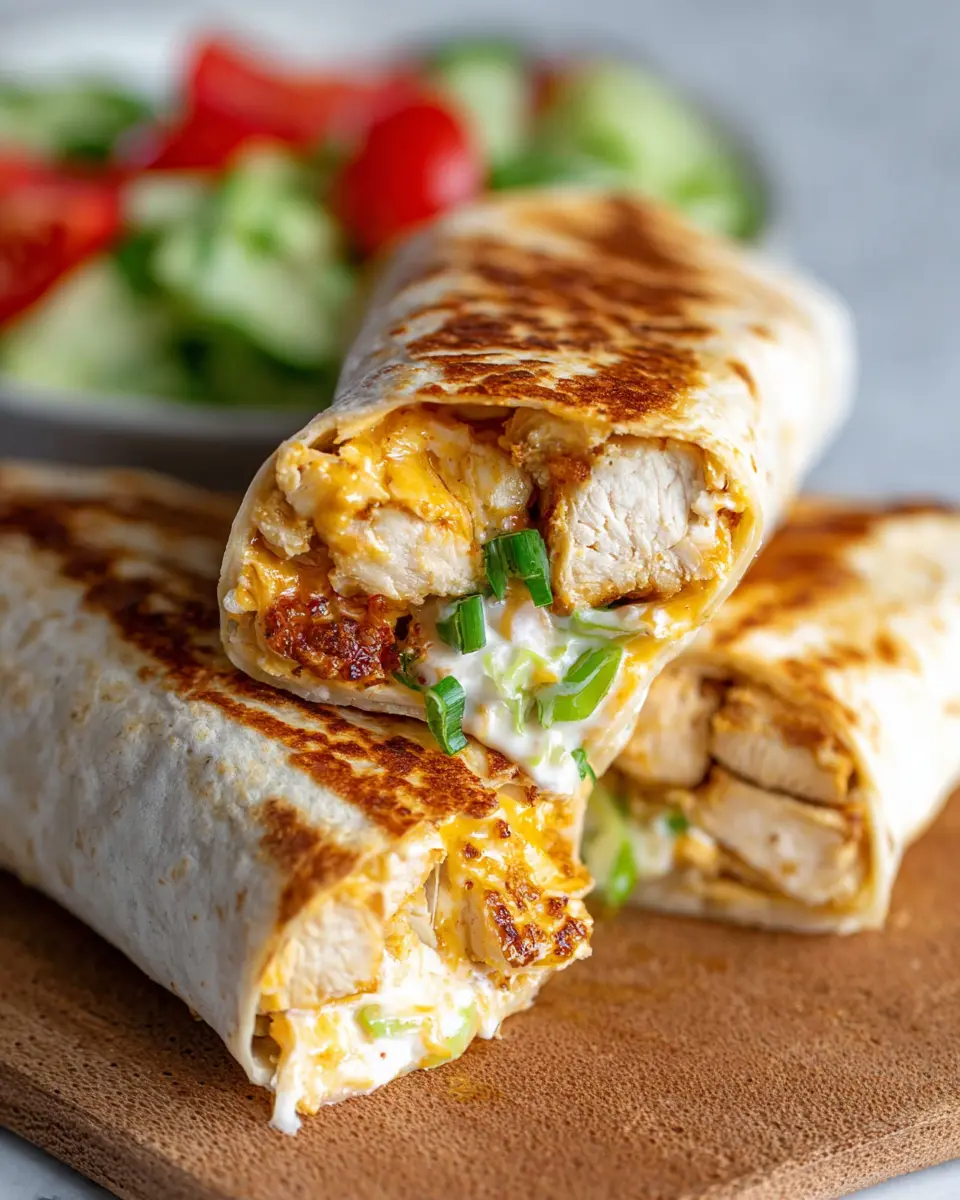
In a mixing bowl, combine the chopped chicken, minced garlic, mayonnaise, Greek yogurt, hot sauce, and salt. Mix them until well-combined. Don’t skip this step; the creamy mix is what makes the wrap irresistibly tasty! This filling can be stored in the fridge for up to three days, making it a great option for meal prep.
Assemble Your Wraps
Now comes the fun part—assembling your Cheesy Garlic Chicken Wraps! Lay out your tortilla and sprinkle about 2 tablespoons of grated cheese on the lower third. Heap on approximately ⅔ cup of the chicken mixture, then top it off with another tablespoon of cheese and a sprinkle of chopped green onions for that fresh crunch.
To wrap, fold in the sides of the tortilla and then roll it tightly from the bottom. This technique helps keep all those delicious ingredients packed inside.
Cook to Perfection
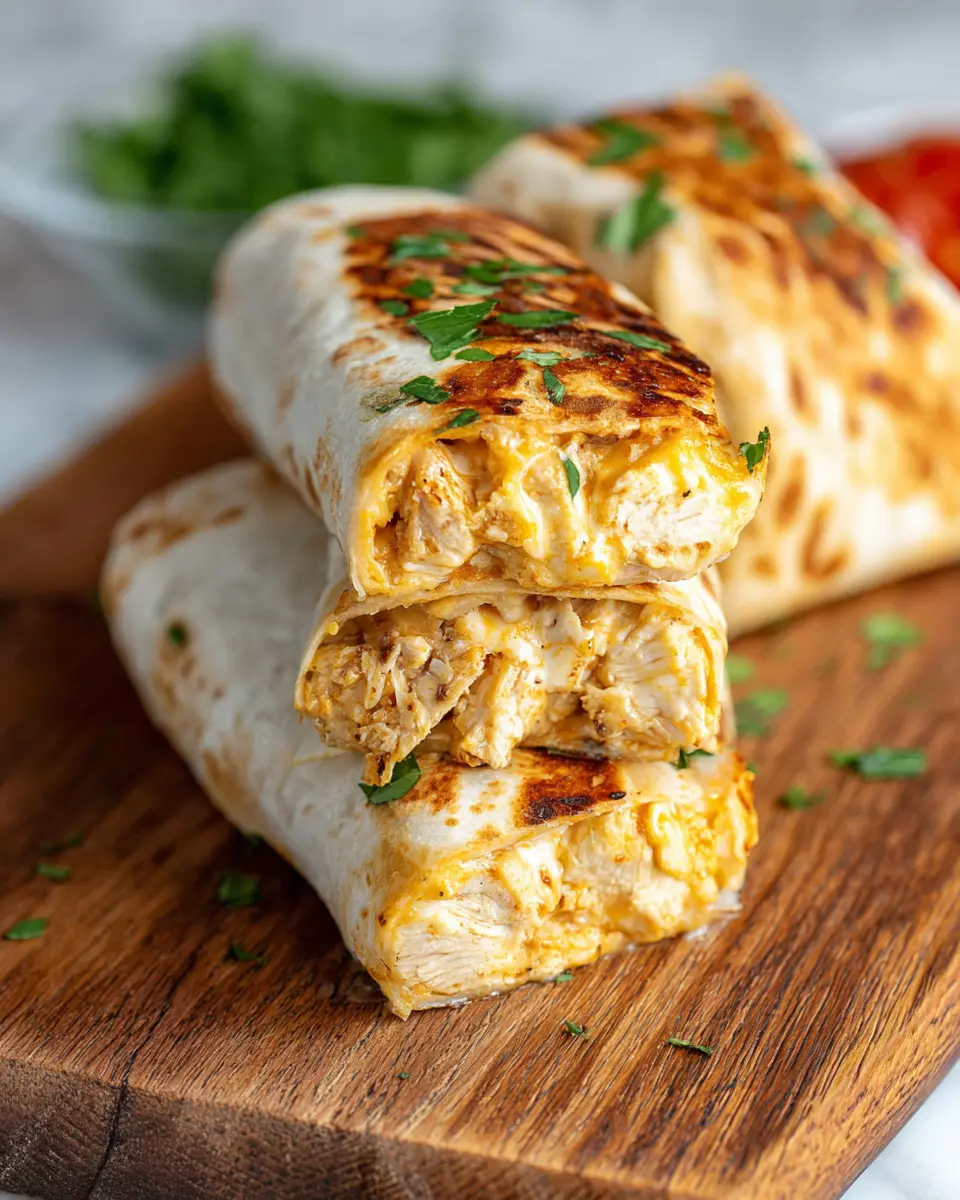
Heat a non-stick pan over medium-high heat and give it a quick spray with olive oil. Place your assembled wraps seam-side down and cook for 3-4 minutes on each side until they turn golden brown and crispy. For an extra melty filling, cover the pan with a lid; this creates steam that warms the inside beautifully.
Slice and Serve
Once perfectly golden and crisp, carefully slice your Cheesy Garlic Chicken Wraps in half and serve them hot. They’re delightful on their own, but you can elevate your meal by serving them with a side salad, roasted veggies, or even salsas for dipping. Cleaning up? Just toss the leftovers in the fridge and enjoy them for up to two days!
With these easy steps, your Cheesy Garlic Chicken Wraps will surely become a go-to favorite in no time. Happy cooking!
Variations on Cheesy Garlic Chicken Wraps
Spicy Cheesy Garlic Wraps
For those who crave a kick, try adding sliced jalapeños or a dash of cayenne pepper to your Cheesy Garlic Chicken Wraps. You can also replace the regular hot sauce with a spicier variety. This not only amps up the flavor but also complements the cheesy goodness beautifully. Pair these spicy wraps with a refreshing yogurt dip, and you’ve got an unforgettable meal!
Vegetarian Version with Grilled Veggies
Looking to switch things up? Create a delicious vegetarian variation by swapping out the chicken for grilled vegetables like bell peppers, zucchini, and mushrooms. Toss them in the same garlicky mayo mixture, and layer with all the cheese you desire. This option is just as satisfying and a great way to enjoy healthy ingredients while still indulging in the cheesy goodness. For more veggie ideas, check out resources like The Spruce Eats.
With these variations, your Cheesy Garlic Chicken Wraps can be a delightfully diverse addition to your meal rotation!
Cooking Tips and Notes for Cheesy Garlic Chicken Wraps
When preparing Cheesy Garlic Chicken Wraps, a few handy tips can make a world of difference. First, using rotisserie chicken saves time, but feel free to grill or sauté your own for extra flavor.
Make sure your tortillas are pliable; warm them briefly in the microwave before filling. For an extra crispy texture, consider using an air fryer or a hot skillet—just don’t forget to cover the pan to melt that delicious cheese.
Don't forget, you can mix up the fillings! Add veggies like bell peppers or spinach for a nutritious boost. Enjoy these wraps with a side salad or some zesty salsa for a complete meal!
Serving Suggestions for Cheesy Garlic Chicken Wraps
These Cheesy Garlic Chicken Wraps are not just delicious on their own; you can elevate the experience with some thoughtful side dishes. Here are a few ideas to make your meal even more satisfying:
-
Fresh Salad: Pair your wraps with a crunchy salad topped with mixed greens, cucumbers, and a light vinaigrette for a refreshing contrast.
-
Roasted Vegetables: Consider roasting seasonal veggies like bell peppers or zucchini; their natural sweetness complements the savory wraps beautifully.
-
Dipping Sauces: Serve with a side of salsa or a zesty yogurt dip for an extra layer of flavor.
-
Snack Options: Don't forget about chips or crunchy snacks on the side! They add a nice crunch and are perfect for dipping.
Explore these options and let your Cheesy Garlic Chicken Wraps shine as the star of your meal!
Time Breakdown for Cheesy Garlic Chicken Wraps
Preparation Time
Get started on these Cheesy Garlic Chicken Wraps in just 15 minutes! This quick prep is all about mixing the chicken and flavors, setting you up for a delicious meal.
Cooking Time
Cook the wraps to perfection in only 7 minutes. With this fast cooking time, you’ll be enjoying a crispy, gooey treat before you know it!
Total Time
In a total of 22 minutes, you can whip up these satisfying wraps. Perfect for a busy lunch or a cozy dinner, this recipe shows that good things come to those who don’t wait too long!
For step-by-step instructions and tips, be sure to check the full recipe.
Need a flavorful twist for your meal prep? Discover more about the benefits of meal prepping at MyFitnessPal.
Nutritional Facts for Cheesy Garlic Chicken Wraps
When it comes to enjoying a delicious meal without sacrificing your dietary goals, the Cheesy Garlic Chicken Wraps come out on top! Here’s a quick look at their nutritional values that make them both satisfying and healthy.
Calories
Each wrap contains approximately 476 calories, making it a hearty yet manageable option for lunch or dinner. This balance ensures you won’t feel deprived while enjoying a flavorful meal.
Protein
Packed with around 38 grams of protein, these wraps are an excellent choice for those looking to stay full and fueled throughout their busy day. The chicken, combined with cheese, delivers a great protein punch that supports muscle recovery and overall health.
Sodium
With approximately 1,090 milligrams of sodium per serving, it's wise to enjoy these cheesy wraps in moderation, especially if you're watching your salt intake. Pairing them with a fresh salad can help balance the sodium levels while adding nutrient-rich fiber.
For more insights on meal prep and nutritional balance, check out resources from the Academy of Nutrition and Dietetics and the USDA's nutrition guidelines. Your body will thank you!
FAQs about Cheesy Garlic Chicken Wraps
Can I use leftover chicken for this recipe?
Absolutely! Leftover chicken is perfect for Cheesy Garlic Chicken Wraps. Whether it's rotisserie chicken, grilled chicken breast, or even turkey bacon, using what you have on hand not only saves time but also adds delicious flavor. Just make sure to chop it into bite-sized pieces for easy filling.
How can I make these wraps healthier?
To give your wraps a healthier twist, consider using low-carb or whole-grain tortillas. You can also reduce the amount of cheese or substitute it with a lighter option like low-fat cheese. Adding more veggies like spinach, bell peppers, or shredded carrots can boost nutrition and fiber content, making them more wholesome without sacrificing flavor.
What's the best way to store leftover wraps?
If you have any wraps left over, store them in an airtight container in the fridge for up to two days. When you’re ready to enjoy them again, reheat in a skillet or air fryer to restore that crispy goodness. For meal prep, consider keeping the filling separate from the tortillas to maintain freshness longer.
Conclusion on Cheesy Garlic Chicken Wraps
In summary, Cheesy Garlic Chicken Wraps offer a delightful balance of flavor and nutrition, making them an ideal choice for any meal. Quick to prepare and packed with protein, these wraps will quickly become a staple in your kitchen. Enjoy them with a fresh salad or your favorite dipping sauce for a satisfying treat!
Cheesy Garlic Chicken Wraps
Equipment
- Non-stick Pan
- bowl
Ingredients
- 2 large tortillas regular or low-carb/high-protein
- 7 oz cooked chicken about 200 grams, chopped (rotisserie is great)
- 2 cloves garlic minced or grated (adjust to taste)
- 2 tablespoons light mayonnaise
- 1 tablespoon light Greek yogurt or plain yogurt
- 2 teaspoons hot sauce like Frank’s
- ¼ teaspoon salt
- 3 oz grated cheese about 90 grams (I used a cheddar blend)
- 1 green onion chopped
- Olive oil spray
Instructions
- In a bowl, mix chopped chicken, garlic, mayonnaise, yogurt, hot sauce, and salt.
- Lay out your wrap. On the lower third of the tortilla, sprinkle about 2 tablespoons of cheese, then top with about ⅔ cup of the chicken mixture. Add another tablespoon of cheese and a sprinkle of green onion.
- Fold in the sides of the tortilla, then roll it up tightly from the bottom.
- Heat a non-stick pan over medium-high. Spray with olive oil.
- Place wraps seam-side down. Cook for 3–4 minutes per side until crispy and golden. Cover with a lid to help heat the inside.
- Slice in half and serve!
Leave a Reply