
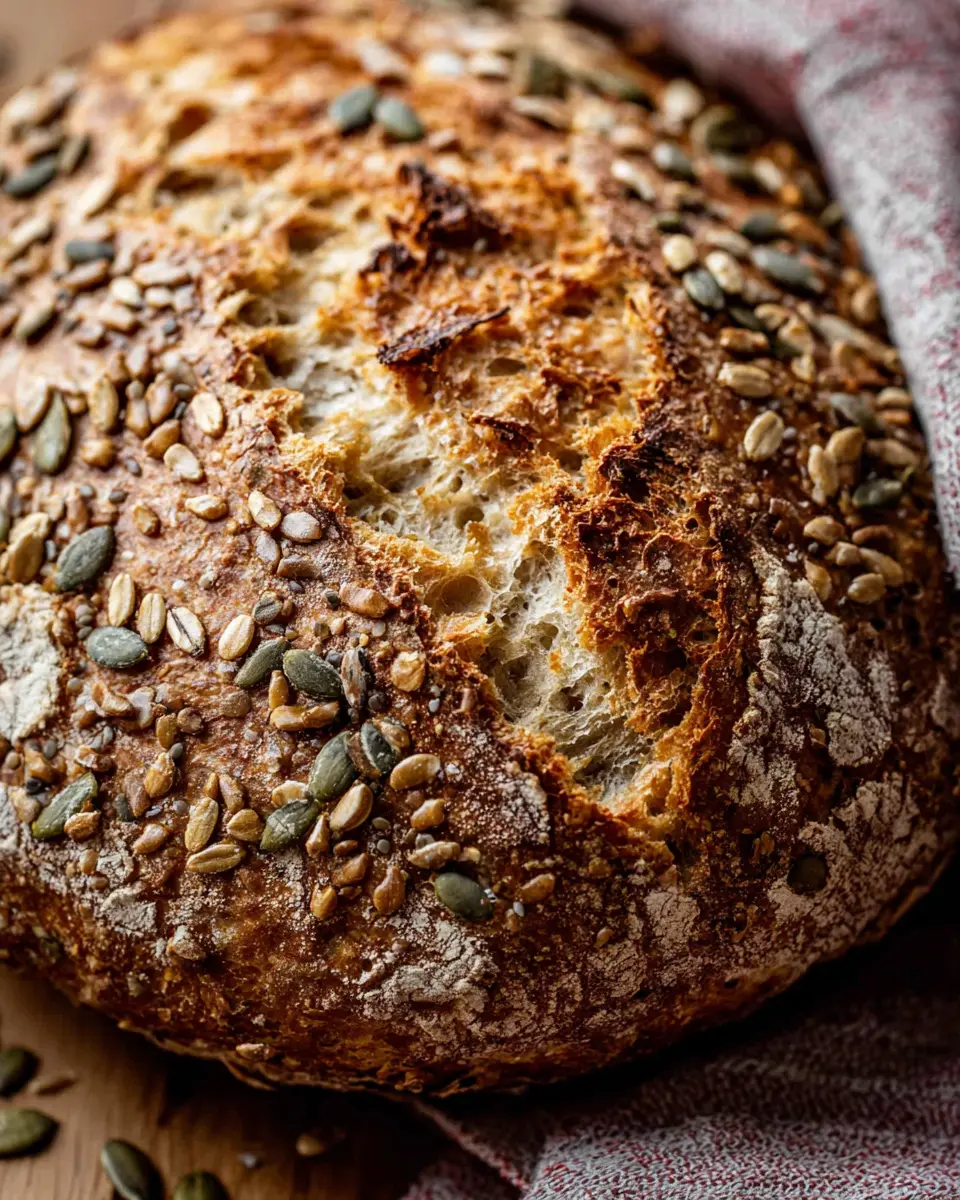
Introduction to No Knead Seeded Oat Bread
When you’re balancing a busy career, homemade bread may seem like a luxury, but it’s actually a game changer for young professionals. Picture this: a warm, golden loaf of no knead seeded oat bread waiting for you at home. It's not just about the incredible aroma — homemade bread tastes far better than store-bought, and you can customize it with your favorite seeds and grains. Plus, it’s an impressive skill to showcase at gatherings or a comforting treat for those long work days.
Why No-Knead Recipes Are Perfect for You
The beauty of no-knead recipes lies in their simplicity. With just a few ingredients and minimal hands-on time, you can prepare a delightful bread that might seem like it took hours of effort. This method relies on longer fermentation times to develop flavor and texture, allowing the yeast to work its magic without demanding you to knead.
According to culinary experts, no-knead bread is not only easier but also more forgiving for beginners. Have you ever found yourself intimidated by recipes requiring intricate techniques? This no knead seeded oat bread eliminates that stress, letting you focus on enjoying the process of baking rather than fretting over precise methods.
For more tips on crafting perfect bread or to deepen your understanding of yeast, check out Sally's Baking Addiction for helpful guides and insights.
Essential ingredients for the perfect loaf
Creating a hearty no knead seeded oat bread is not only about the process; it’s essential to start with quality ingredients. Here’s what you'll need:
- Bread Flour: 3 cups provide the right gluten structure for a chewy texture.
- Instant Yeast: 2 teaspoons to give that lovely rise and airy crumb.
- Whole Rolled Oats: 1 cup for added texture and flavor.
- Seeds: Pumpkin seeds, sunflower seeds, and flax seeds or sesame seeds contribute crunch and nutritional value.
- Salt: 2 teaspoons enhance flavor—not just from table salt, but using coarse salt really makes a difference.
- Honey: A touch of sweetness from 2 tablespoons.
- Warm Water: 1.5 cups are key for activating the yeast.
With these fundamentals, your bread is set for success!
Variations for ingredient preferences
Feel free to experiment with this no knead seeded oat bread recipe to suit your taste! Don’t have pumpkin seeds? Substitute with your favorite nuts or seeds. If you want to up your game, consider adding spices like cinnamon or herbs for a unique twist. For an egg-free option, maintain the recipe as is—just ensure your baking conditions are right, and you’ll still have a delightful loaf bursting with flavor. Always feel free to adjust ingredients based on dietary preferences or to use what you have on hand.
For more tips on ingredient substitutions, check out Sally's Baking Addiction for all things baking!
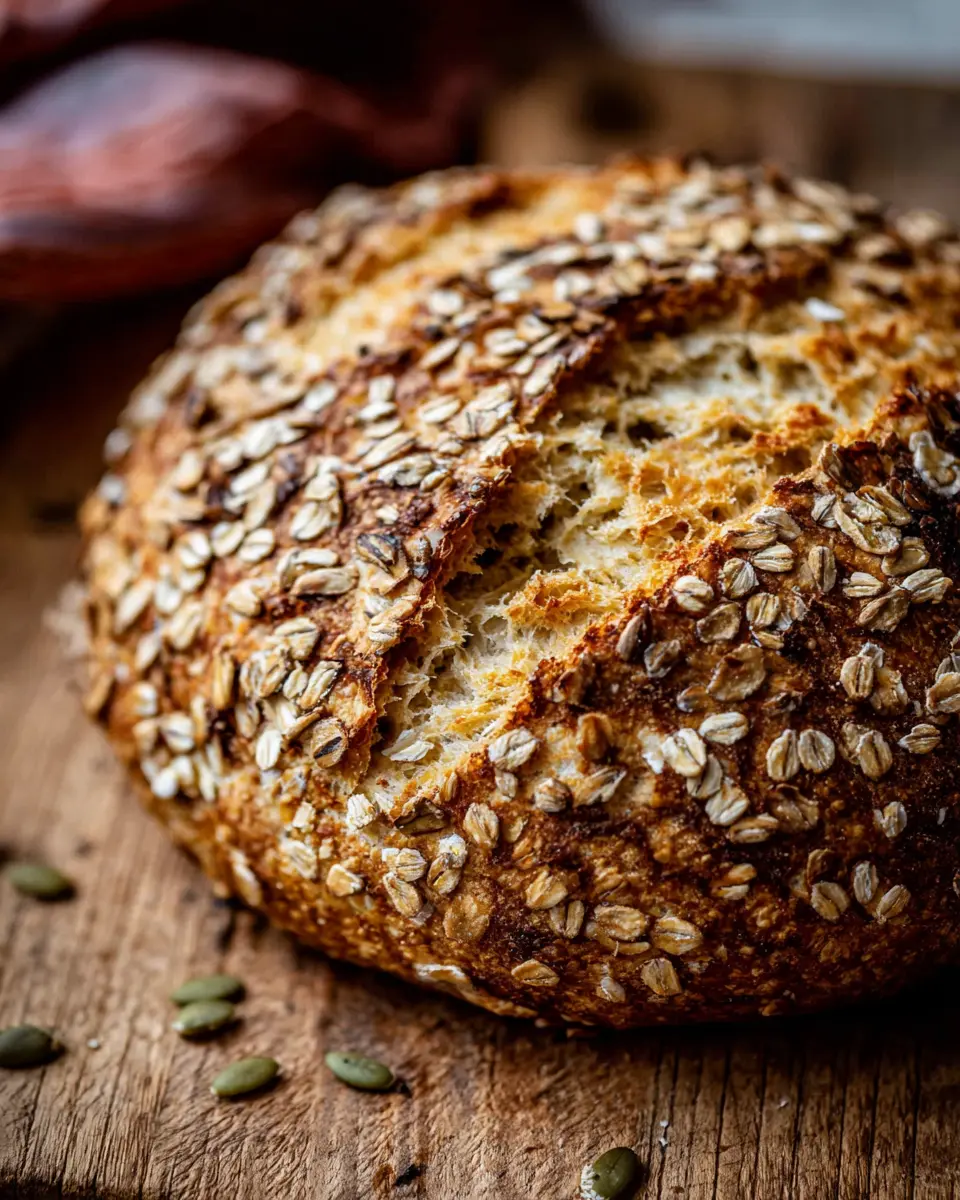
Step-by-Step Preparation of No Knead Seeded Oat Bread
Making no knead seeded oat bread is a delightful journey into baking, offering both hearty flavors and comforting aromas. Let’s walk through each step to ensure your loaf turns out perfectly!
Gather and Measure Your Ingredients
First things first: you’ll want to gather your ingredients to set yourself up for success. Here’s what you need:
- 3 cups bread flour
- 2 teaspoons instant yeast
- 1 cup old-fashioned rolled oats
- ¼ cup pumpkin seeds
- ¼ cup sunflower seeds
- 2 tablespoons flax seeds
- 2 teaspoons coarse salt
- 2 tablespoons honey
- 1 and ½ cups warm water
Don’t forget a pinch of optional cornmeal for dusting the pan! Measuring accurately is crucial when baking, so consider checking out this guide to measuring baking ingredients for best practices.
Mix Dry and Wet Ingredients Together
In a large mixing bowl, it’s time to combine your dry ingredients! Start by whisking together the flour, instant yeast, oats, pumpkin seeds, sunflower seeds, and salt. In a separate container, mix the honey and warm water, then pour it over the dry ingredients. As you mix with a silicone spatula or wooden spoon, don’t worry if it looks a bit rough. It should be sticky and shaggy—that’s exactly what you want!
Let the Dough Rise and Develop Flavor
Cover your bowl tightly with plastic wrap or aluminum foil and set it aside at room temperature. This is where the magic happens—let the dough rise for about 3 hours. During this time, it will double in size and fill with delightful air bubbles. For enhanced flavor, consider letting the dough rest in the refrigerator for at least 12 hours; it’ll taste even better!
Shape the Dough for the Final Rise
Once your dough has risen, it’s time for shaping. Dust a nonstick baking sheet with flour (or cornmeal) and, with floured hands, gently shape the dough into a ball. Place it on the prepared baking sheet and sprinkle your topping ingredients—the remaining oats, pumpkin seeds, and sunflower seeds—on top. If the seeds don’t stick well, press them in gently. Cover it loosely and allow the dough to rest for another 45 minutes while you preheat the oven to 425°F (218°C).
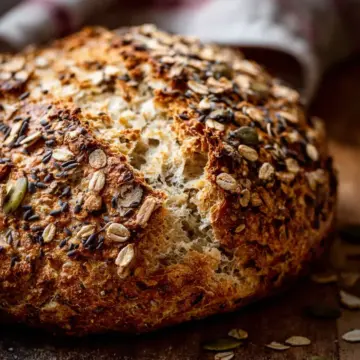
Bake and Enjoy the Aroma
Now for the most rewarding step: baking! Score the top of the dough with a sharp knife to allow steam to escape. For an extra crispy crust, you can create steam in your oven by adding a pan of hot water on a lower rack. Bake the bread for about 40 minutes until it’s golden brown and sounds hollow when tapped. The moment you take it out, let the aroma fill your kitchen—you’ll be impressed by your creation!
Variations on No Knead Seeded Oat Bread
Adding herbs for extra flavor
Looking to elevate your no knead seeded oat bread? Fresh or dried herbs can add a wonderful twist. Consider including:
- Rosemary or Thyme: These herbs provide a warm, earthy flavor.
- Oregano: Adds a Mediterranean touch.
- Dill: Perfect for a light, refreshing bite.
Simply mix in about 1 to 2 tablespoons when combining your dry ingredients. It’s an easy way to customize this versatile bread!
Alternative seeds and grains to consider
Feel free to get creative with the seeds in your no knead seeded oat bread. Some fabulous alternatives are:
- Chia Seeds: These add a nutritious boost and a slight crunch.
- Poppy Seeds: A classic addition for both flavor and visual appeal.
- Quinoa or Millet: Incorporating these grains can enhance the texture and nutritional value.
Mix and match based on your taste preferences or pantry staples, and enjoy experimenting with flavors!
For more inspiration on using grains and seeds, check out The Whole Grains Council.
Cooking Tips and Notes for No Knead Seeded Oat Bread
Managing Dough Stickiness
Let's be honest—working with dough can sometimes feel like trying to handle a eager toddler! Your no knead seeded oat bread dough is going to be quite sticky, and that’s totally fine. A gentle dusting of flour on your hands can make shaping it a bit easier. Remember, this dough is meant to be wet to achieve that light, airy texture. If you find it's too tacky, just sprinkle in a little more flour until you reach a manageable consistency.
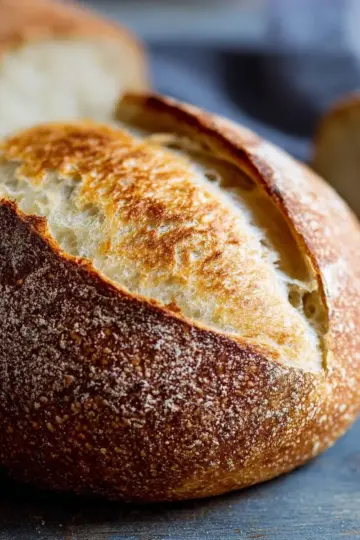
Importance of Steam in the Oven
Creating that perfect crust on your no knead seeded oat bread is all about steam! Steam helps your loaf expand while baking, leading to a beautiful, crispy crust. To harness the full steam magic, place a shallow pan with boiling water in the oven as you bake. It’s a simple trick that makes a huge difference in the final texture. Trust me; your taste buds will thank you! For more baking tips, you might find this resource helpful.

Serving Suggestions for No Knead Seeded Oat Bread
Creative ways to enjoy your bread
There’s nothing like freshly baked no knead seeded oat bread to elevate your meals! Try toast topped with smashed avocado sprinkled with chili flakes for a quick breakfast. For lunch, make a hearty sandwich piled high with turkey bacon, lettuce, and your favorite mustard. You can even slice it for a rustic charcuterie board paired with cheeses and olives for a fun evening gathering.
Pairing ideas with spreads and dishes
Consider these delicious pairings to complement your no knead seeded oat bread:
- Classic Butters: Spread it with herb-infused butter for a delightful side at dinner.
- Savory Spreads: Hummus or roasted red pepper spread can add a savory punch.
- Soups and Salads: Serve alongside a warm vegetable soup or mixed greens drizzled with vinaigrette.
- Sweet Options: Enjoy slices with cream cheese and fresh fruit preserves for a delightful snack.
These suggestions will make your no knead seeded oat bread the star of the show!
Consider checking out Bon Appétit for more inspiration on pairings and serving ideas.
Time Breakdown for No Knead Seeded Oat Bread
Preparation Time
Creating your no knead seeded oat bread is both simple and time-efficient. You’ll need about 4 hours of prep time, which includes mixing the ingredients and allowing the dough to rise beautifully.
Rising Time
This bread requires a thorough rising session. Allow the dough to rest at room temperature for approximately 3 hours to get those perfect air bubbles. For an even richer flavor, consider letting it chill in the refrigerator for anywhere from 12 hours up to 3 days!
Baking Time
When it’s time to bake, preheat your oven to 425°F (218°C) and let that loaf bake for about 40 minutes. You'll know it’s done when the crust turns a lovely golden brown and sounds hollow when tapped.
Feel free to check out my Baking with Yeast Guide for tips on working with yeast if you're new to baking!
Nutritional Facts for No Knead Seeded Oat Bread
Calories per serving
This hearty no knead seeded oat bread packs about 120-150 calories per slice, making it a nutritious choice for breakfast or a snack. You can feel good about enjoying a slice or two!
Fiber content
Thanks to the whole rolled oats and various seeds, each slice contains approximately 3-4 grams of dietary fiber. Fiber is essential for digestion and helps keep you full longer, perfect for those busy days when energy is key.
Vitamins and minerals
This wholesome bread is rich in vitamins and minerals, including magnesium, zinc, and B vitamins from the seeds and oats. Incorporating it into your diet not only satisfies your taste buds but also boosts your nutritional intake—what’s not to love about that?
For more information on the nutritional benefits of whole grains, check out this article. Enjoy your baking!
FAQs about No Knead Seeded Oat Bread
Can I substitute ingredients in the recipe?
Absolutely! The beauty of no knead seeded oat bread is its versatility. You can swap out seeds based on your taste preferences or what you have on hand. For example, consider using chia seeds instead of flax seeds or adding poppy seeds for an extra crunch. If you don’t have bread flour, all-purpose flour works in a pinch, though it may slightly alter the texture.
How do I store leftover bread?
To keep your no knead seeded oat bread fresh, store it in a bread bag or wrap it loosely in a kitchen towel at room temperature for up to 3 days. If you want to extend its shelf life, you can refrigerate it for up to 10 days or freeze it for up to 3 months. Just be sure to slice it first for easier thawing!
What is the best way to reheat or serve it?
Reheat your bread in the oven at 350°F (175°C) for about 10 minutes for a warm, crusty finish. Alternatively, to enjoy a delightful breakfast, try toasting a slice and topping it with avocado or a spread of your choice. Perfect for a busy morning!
Conclusion on No Knead Seeded Oat Bread
Recap of the joys of homemade bread
Creating your own no knead seeded oat bread is a delightful journey filled with satisfying anticipation. There's something magical about pulling a warm loaf from the oven and savoring that incredible aroma. Not only is it healthier, but homemade bread brings a sense of accomplishment and comfort to your kitchen.
Encouragement to give the recipe a try
If you haven't yet tried this simple recipe, now’s the perfect time! Don't hesitate to dive in—whether you’re a baking novice or a seasoned pro, this no knead seeded oat bread will surely impress. Enjoy the process and the delicious results that come with a little patience and love. Happy baking!
No Knead Seeded Oat Bread
Equipment
- Large mixing bowl
- baking sheet
- silicone spatula
- Sharp knife
Ingredients
Dry Ingredients
- 3 cups bread flour (spooned & leveled)
- 2 teaspoons instant yeast Platinum Yeast from Red Star
- 1 cup old-fashioned whole rolled oats
- ¼ cup pumpkin seeds (pepitas)
- ¼ cup sunflower seeds salted or unsalted
- 2 Tablespoons flax seeds or sesame seeds
- 2 teaspoons coarse salt
Wet Ingredients
- 2 Tablespoons honey
- 1.5 cups warm water (about 95°F/35°C)
Optional Ingredients
- cornmeal for dusting pan
Topping
- 1 Tablespoon old-fashioned whole rolled oats
- 1 Tablespoon pumpkin seeds (pepitas)
- 1 Tablespoon sunflower seeds
- 1 teaspoon flax seeds or sesame seeds
Instructions
Preparation
- Watch the video below before you begin, and let that be your visual guide for this recipe.
- In a large un-greased mixing bowl, whisk the flour and yeast together. Add the oats, pumpkin seeds, sunflower seeds, flax seeds, and salt and whisk to combine. Mix the honey and water together, and then pour over the dry ingredients. Using a silicone spatula or wooden spoon, gently mix together. The dough will seem dry and shaggy, but keep working it until all the flour is moistened. If needed, use your hands to work the dough ingredients together. The dough will be very sticky. Shape into a ball as best you can.
- Cover the dough tightly with plastic wrap or aluminum foil and set on the counter at room temperature. Allow to rise for 3 hours.
- For best flavor and texture, let the risen dough rest in the refrigerator for at least 12 hours and up to 3 days.
- Lightly dust a large nonstick baking sheet with flour and/or cornmeal. Shape the risen dough into a ball and transfer it to the prepared baking sheet.
- Mix topping ingredients together and sprinkle on top of the dough. Loosely cover and allow dough to rest for 45 minutes.
- During this time, preheat the oven to 425°F (218°C).
- When ready to bake, score the dough with a slash or X about ½ inch deep.
- Place the shaped and scored dough in the preheated oven on the center rack.
- Optional: Place a shallow pan on the bottom oven rack and pour boiling water into it to create steam for a crispier crust.
- Bake for 40 minutes or until the crust is golden brown.
- Remove the bread from the oven and allow to cool for at least 10–20 minutes before slicing and serving.


Leave a Reply