
Introduction to Sticky Chicken Fingers
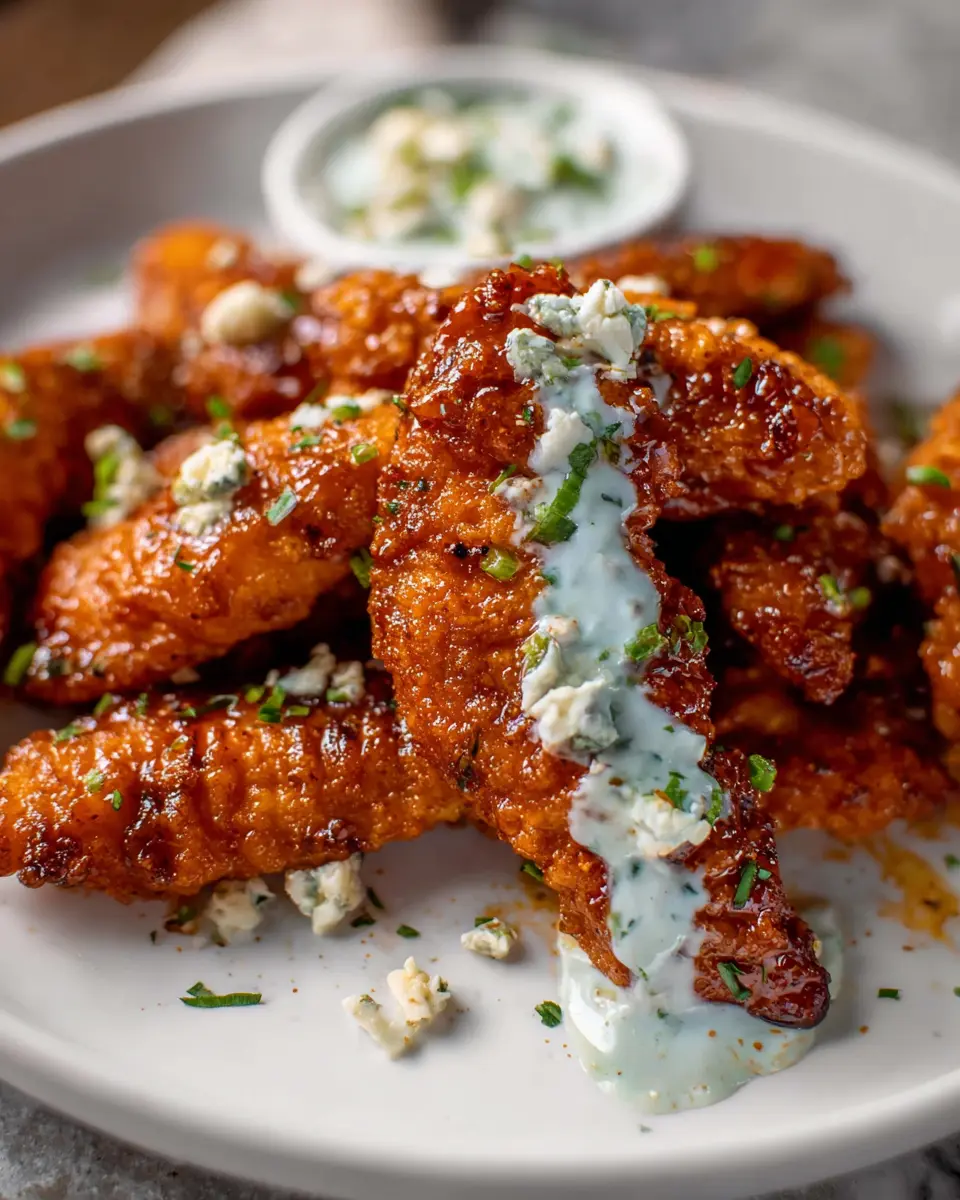
If you're searching for a delicious recipe that combines crunch, flavor, and a bit of indulgence, look no further than sticky chicken fingers. These aren't your average chicken tenders—each bite is a perfect blend of crispy coating and a sticky, sweet, and spicy glaze that takes comfort food to the next level.
Why Sticky Chicken Fingers Are a Game Changer
Imagine a kitchen filled with the mouthwatering aroma of chicken baking, as you prepare a dish that will have everyone asking for seconds. The magic lies in the baked approach, which not only keeps things healthier but also allows you to enjoy that satisfying crunch without the guilt. The sticky sauce—made from brown sugar and buffalo wing sauce—adds a unique twist, making every bite irresistibly good.
A fun fact: Did you know that chicken fingers date back to the 1970s but have evolved to become a staple on menus everywhere? This version, served with a tangy yogurt blue cheese sauce, satisfies taste buds while being easy to whip up on a weeknight or serve at gatherings. So, if you're up for a culinary adventure, these sticky chicken fingers are about to become your new go-to!
Feel free to explore more about the benefits of using healthier ingredients in your meals at websites like Healthline.
Ingredients for Sticky Chicken Fingers
Essential ingredients for the chicken
Creating the perfect sticky chicken fingers starts with the right ingredients. Here’s what you’ll need:
- 1 pound chicken tenders: Go for fresh or frozen, just make sure they're thawed if you choose the latter.
- Kosher salt and pepper: Essential for seasoning, don’t skimp!
- Garlic powder: Adds a lovely depth of flavor.
- 1 cup flour: This gives your chicken that crispy base.
- 2 large eggs: Lightly beaten, they help the breadcrumbs stick beautifully.
- ¾ cup panko breadcrumbs: For that extra crunch.
- ¼ cup seasoned fine breadcrumbs: These will enhance the flavor profile.
- Olive oil spray: Ensures a golden finish while keeping it healthy.
Ingredients for the yogurt blue cheese sauce
To balance out the richness of the sticky chicken fingers, you’ll want a tangy yogurt blue cheese sauce. Here’s what you need:
- 1 cup plain Greek yogurt: The base that adds a creamy texture.
- 1 lemon, juiced: Fresh lemon juice brightens the flavors.
- Kosher salt and pepper: A big pinch of each, to taste.
- ¾ cup crumbled blue cheese: The star of the show, providing that distinctive flavor.
- 2 green onions, thinly sliced: For a bit of freshness and crunch.
With these ingredients, you're all set to make some irresistibly sticky chicken fingers!
Preparing Sticky Chicken Fingers
Making delicious sticky chicken fingers is an enjoyable process that not only fills your kitchen with mouthwatering aromas but also brings people together for a delightful meal. Here’s how to prepare them step-by-step!
Gather and Prepare Your Ingredients
Before diving into the cooking process, it's essential to have everything at your fingertips. Gather the following ingredients:
- For the sticky chicken: 1 pound of chicken tenders, kosher salt, pepper, garlic powder, flour, large eggs, panko breadcrumbs, seasoned breadcrumbs, olive oil spray, brown sugar, buffalo wing sauce, unsalted butter, and water.
- For the yogurt blue cheese sauce: plain Greek yogurt, lemon, salt, pepper, crumbled blue cheese, and green onions.
Make sure to wash and prep your veggies, and measure out your ingredients ahead of time to streamline the cooking, maximizing efficiency.
Set Up Your Breading Station
Creating a designated breading station will make the process less messy and more enjoyable.
- Set out three shallow bowls or large plates:
- Fill the first with flour.
- The second should contain your lightly beaten eggs.
- In the third, mix together the panko and seasoned breadcrumbs.
This setup will help you efficiently coat your sticky chicken fingers as you progress.
Season and Bread the Chicken
Now comes the fun part—seasoning the chicken!
- Sprinkle your chicken tenders generously with kosher salt, pepper, and garlic powder. This basic seasoning is crucial as it enhances the flavor of the chicken.
- Now, carefully dip each chicken tender into the flour, ensuring it’s coated evenly. Shake off the excess.
- Next, dip the floured chicken into the egg mixture, followed by the breadcrumb mix. Make sure to press gently so that the crumbs adhere nicely. Once breaded, place the chicken fingers on the prepared wire rack.
Bake the Chicken to Crispy Perfection
Preheat your oven to 425°F. Place your wire rack with the chicken fingers on a baking sheet and pop it in the oven.
- Bake for 12 minutes, then gently flip the chicken over and bake for another 12 minutes. The goal here is golden, crispy perfection without frying.
Make the Sticky Sauce
While your chicken is baking, let’s whip up that delicious sticky sauce!
- In a saucepan over medium heat, combine the brown sugar, buffalo wing sauce, butter, and water. Whisk continuously until the sugar dissolves and the mixture comes to a gentle boil. Simmer for about 2 minutes, then remove from heat.
Drizzle the Sauce and Prepare to Serve
With everything ready, it's time for the grand finale!
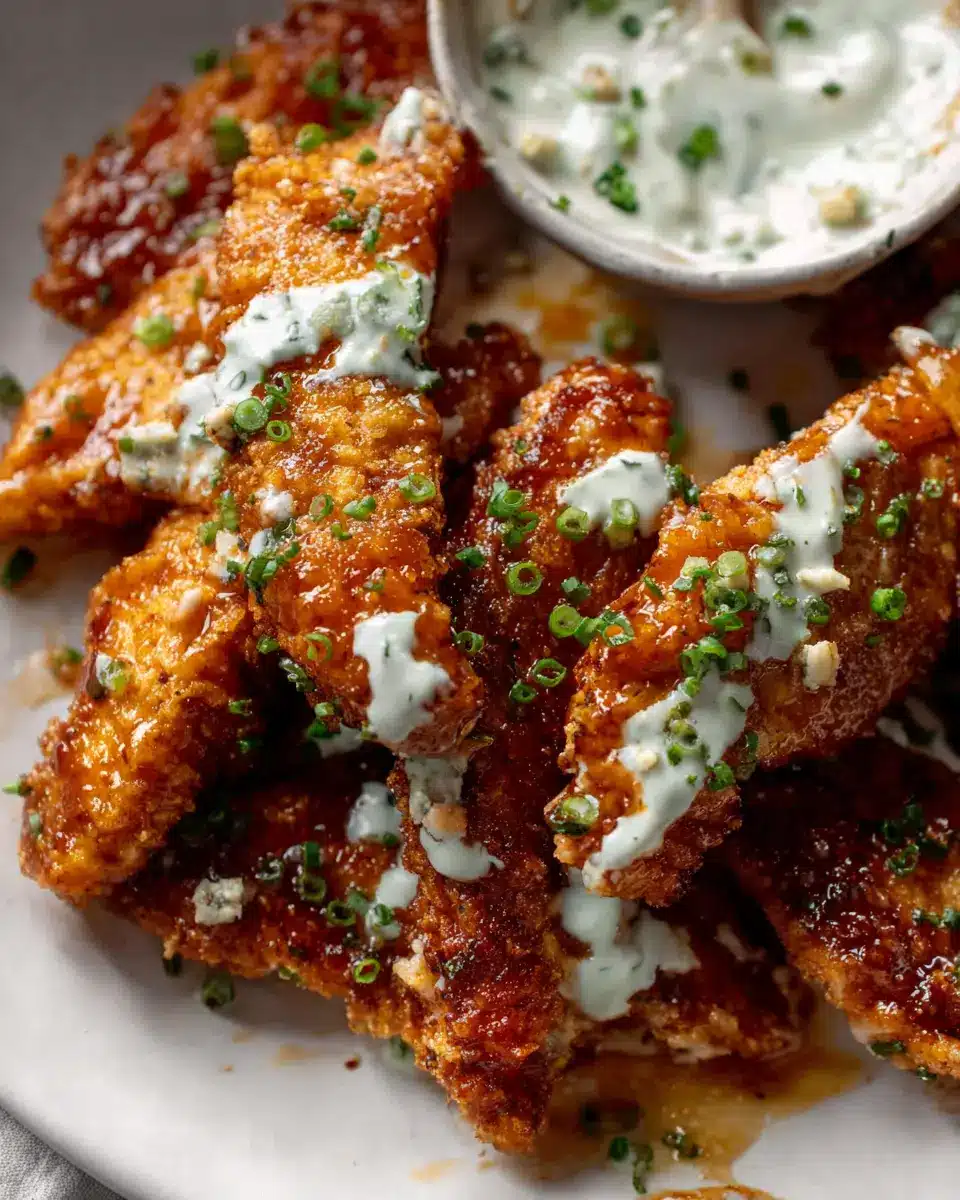
- Once the chicken fingers are baked to crispy perfection, gently lift them from the rack and place them in a bowl. Drizzle the sticky sauce over the top, but be quick—toss them slightly to coat without letting them sit too long to prevent losing their crispy texture.
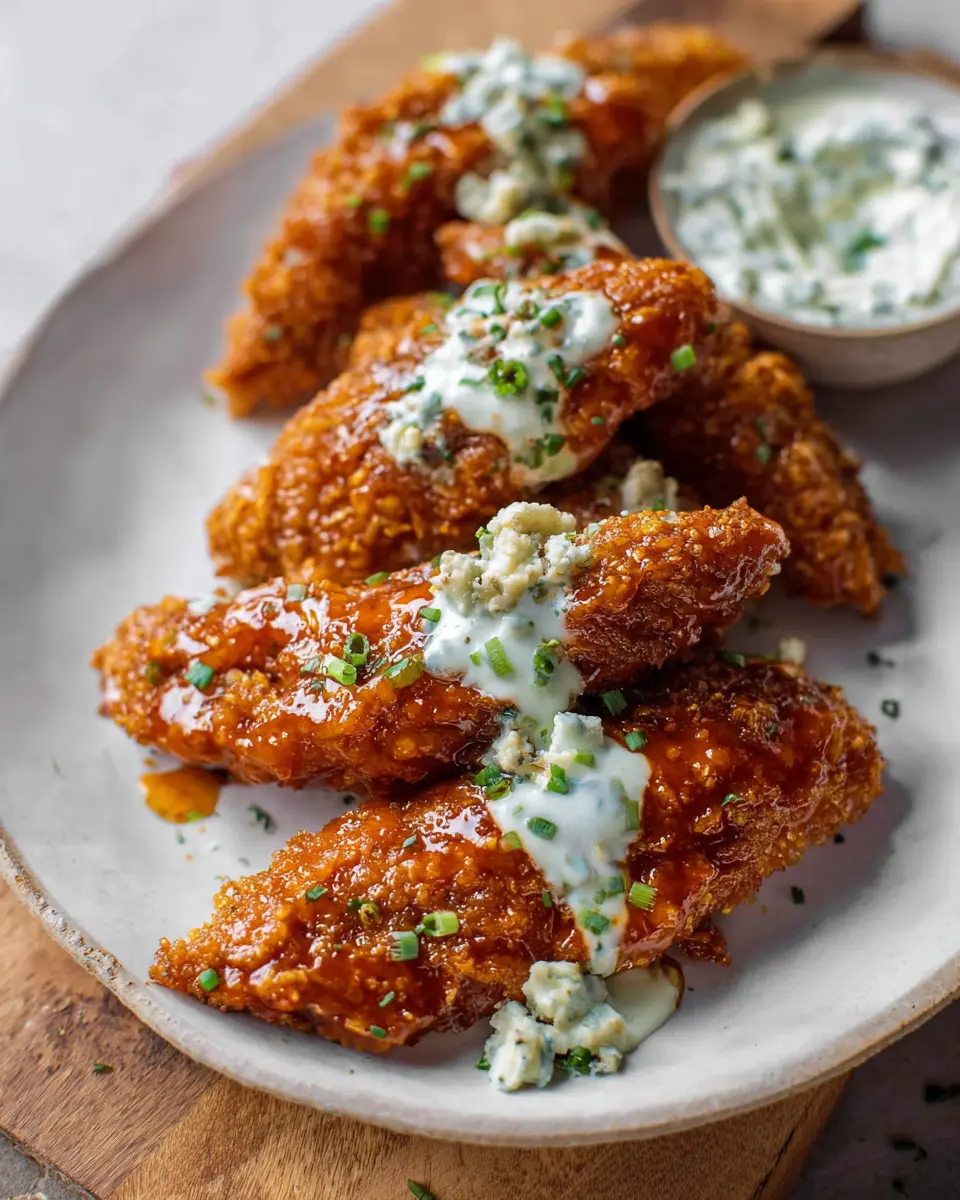
- Serve warm with your homemade yogurt blue cheese sauce on the side for that cool, tangy contrast.
These sticky chicken fingers are bound to be a hit, so gather your friends, share stories, and enjoy your meal together! Happy cooking!
Variations on Sticky Chicken Fingers
Sticky Chicken Fingers with Different Sauces
Feeling adventurous? Switch up the flavor profiles of your sticky chicken fingers by experimenting with various sauces. Try a tangy honey mustard glaze for a zesty twist or a classic barbecue sauce that brings out the sweetness of the brown sugar. For those who love a kick, a sriracha-infused sauce makes for a fiery option everyone will rave about!
Alternative Dipping Sauces for Variety
The yogurt blue cheese sauce is a hit, but don’t stop there! Consider a creamy ranch or a cilantro lime dip to complement your sticky chicken fingers. You could even create a fresh tzatziki sauce for a cool, Mediterranean twist. These simple swaps not only add excitement but also help tailor the meal to suit any palate.
Cooking notes for Sticky Chicken Fingers
Tips for ensuring crispy chicken fingers
To achieve the ultimate crispy chicken fingers, start by patting the chicken tenders dry with paper towels before coating them. This ensures a better grip for the flour and breadcrumbs. Don't skip the olive oil spray on the wire rack; it’s essential for that golden crunch. If you feel adventurous, try adding some spices like paprika or cayenne to your breadcrumb mixture for an extra flavor kick!
Oven temperature and cooking time specifics
Preheat your oven to 425°F (220°C) for perfect baking. Bake the sticky chicken fingers for about 12 minutes on one side, then flip for another 12 minutes. This method allows for even cooking and helps to lock in juiciness while achieving that perfectly crunchy texture. Keep an eye on them towards the end—oven times may vary based on your specific appliance!
Serving Suggestions for Sticky Chicken Fingers
Best Sides to Complement Your Chicken Fingers
To elevate your sticky chicken fingers experience, consider pairing them with a variety of tasty sides. Crispy sweet potato fries or classic coleslaw can provide a crunchy contrast, while a refreshing green salad adds a healthy touch. For something a bit different, try garlic roasted Brussels sprouts or creamy mac and cheese. Each option enhances the savory flavors of the chicken and makes your meal feel complete.
Plating Ideas for a Fun Presentation
For a playful presentation, serve your sticky chicken fingers on a colorful platter surrounded by sauces for dipping, like the yogurt blue cheese sauce you made. Arrange your sides creatively—layered in small bowls or scattered artfully on the plate. Don’t forget to garnish with fresh herbs like parsley or chives for an inviting touch. A little creativity can turn a simple meal into a delightful dining experience!
For ideas on more side dishes, check out this resource on side dish pairings.
Time Details for Sticky Chicken Fingers
Preparation Time
The preparation time for these sticky chicken fingers is a quick 15 minutes. Perfect for those busy weeknights or when you're entertaining but want to keep things simple!
Cooking Time
You'll spend about 30 minutes cooking these delicious chicken fingers. This gives you enough time to whip up that irresistible yogurt blue cheese sauce while the chicken bakes to golden perfection.
Total Time
In just 45 minutes, you can have a scrumptious meal ready to go! Whether you're serving them for dinner or as a party snack, these chicken fingers won’t disappoint.
If you're looking for more cooking tips, check out sources like Epicurious or Serious Eats for inspiration!
Nutritional Information for Sticky Chicken Fingers
Curious about the nutritional content of these delicious sticky chicken fingers? Here’s a quick breakdown:
Calories
Each serving contains approximately 350 calories, making these chicken fingers a tasty yet manageable indulgence.
Protein
You’ll benefit from about 25 grams of protein per serving, ensuring a satisfying meal that helps fuel your day.
Sodium
Keep in mind, the sodium content is around 800 mg per serving, so it’s wise to balance this with low-sodium options for your sides!
For more detailed nutritional insights, check out sites like MyFitnessPal or NutritionData to tailor your meal planning. Enjoy your flavorful journey with these sticky chicken fingers!
FAQs about Sticky Chicken Fingers
Can I make sticky chicken fingers ahead of time?
Absolutely! You can prep the sticky chicken fingers and store them in the refrigerator for up to 24 hours before baking. Just keep them covered with plastic wrap or in an airtight container to maintain their freshness. When you’re ready to enjoy, bake them as directed for the perfect crispy texture!
What cooking methods can I use for this recipe?
While baking is our go-to method for these sticky chicken fingers, you can also air-fry them for a quicker option and even more crunch! Simply follow the same breading process and cook them in the air fryer for about 12-15 minutes at 400°F, flipping halfway through.
How can I store leftover chicken fingers?
If you have any sticky chicken fingers left after your meal (which is rare but possible!), store them in an airtight container in the refrigerator for up to three days. To reheat, pop them in the oven at 350°F for about 10-15 minutes to regain that crispy goodness. Enjoy your tasty leftovers!
For further cooking tips, check out Epicurious for more delicious ideas!
Conclusion on Sticky Chicken Fingers
In summary, sticky chicken fingers offer an irresistible blend of crispy texture and delightful flavors. This baked version is a healthier alternative, paired perfectly with the tangy yogurt blue cheese sauce. Whether for a weeknight dinner or a party snack, they’re sure to impress and satisfy! Enjoy the deliciousness!

Sticky Chicken Fingers with Yogurt Blue Cheese Sauce
Equipment
- oven
- baking sheet
- wire rack
- saucepan
Ingredients
sticky chicken
- 1 pound chicken tenders
- kosher salt
- pepper
- 1 cup flour
- 2 large eggs lightly beaten
- ¾ cup panko breadcrumbs
- ¼ cup seasoned fine breadcrumbs
- olive oil spray or nonstick spray, coconut oil spray, avocado oil spray, etc
- 1 cup brown sugar
- ¼ cup buffalo wing sauce
- 3 tablespoons unsalted butter
- 1 tablespoon water
yogurt blue cheese
- 1 cup plain greek yogurt
- 1 whole lemon juiced
- kosher salt big pinch
- pepper big pinch
- ¾ cup crumbled blue cheese
- 2 whole green onions thinly sliced
Instructions
sticky chicken
- Preheat the oven to 425 degrees F. Line a baking sheet with a wire rack. Spray the wire rack with nonstick (or olive oil/coconut oil/avocado oil) spray. This is key so the breading sticks to the chicken!
- Line up 3 bowls or large plates. Put the flour in one, the eggs in the second and stir together both breadcrumbs in the third.
- Sprinkle the chicken all over with salt, pepper and garlic powder, covering both sides. Dip each piece of chicken in the flour, covering completely. Then dip in the egg, then in the breadcrumb mixture, pressing gently so the crumbs adhere. Place each chicken piece on the sprayed wire rack.
- Bake the chicken for 12 minutes, then gently flip and bake for 12 minutes more.
- While the chicken is baking, heat the brown sugar, wing sauce, butter and water in a saucepan over medium heat. Whisk until the sugar dissolves. Let the mixture come to a boil (watch it the entire time!) then reduce it to a simmer and cook for 2 minutes.
- When the chicken is done, gently lift it on the wire rack with a spatula or tongs. Place it on a plate or in a bowl and drizzle it with the sauce.
- Toss in the sauce, then serve on plates with the dip. Enjoy!
yogurt blue cheese
- Mix all ingredients together in a bowl, mashing the blue cheese in as you stir. Serve immediately! You can make this ahead of time and store it in the fridge.
Leave a Reply