
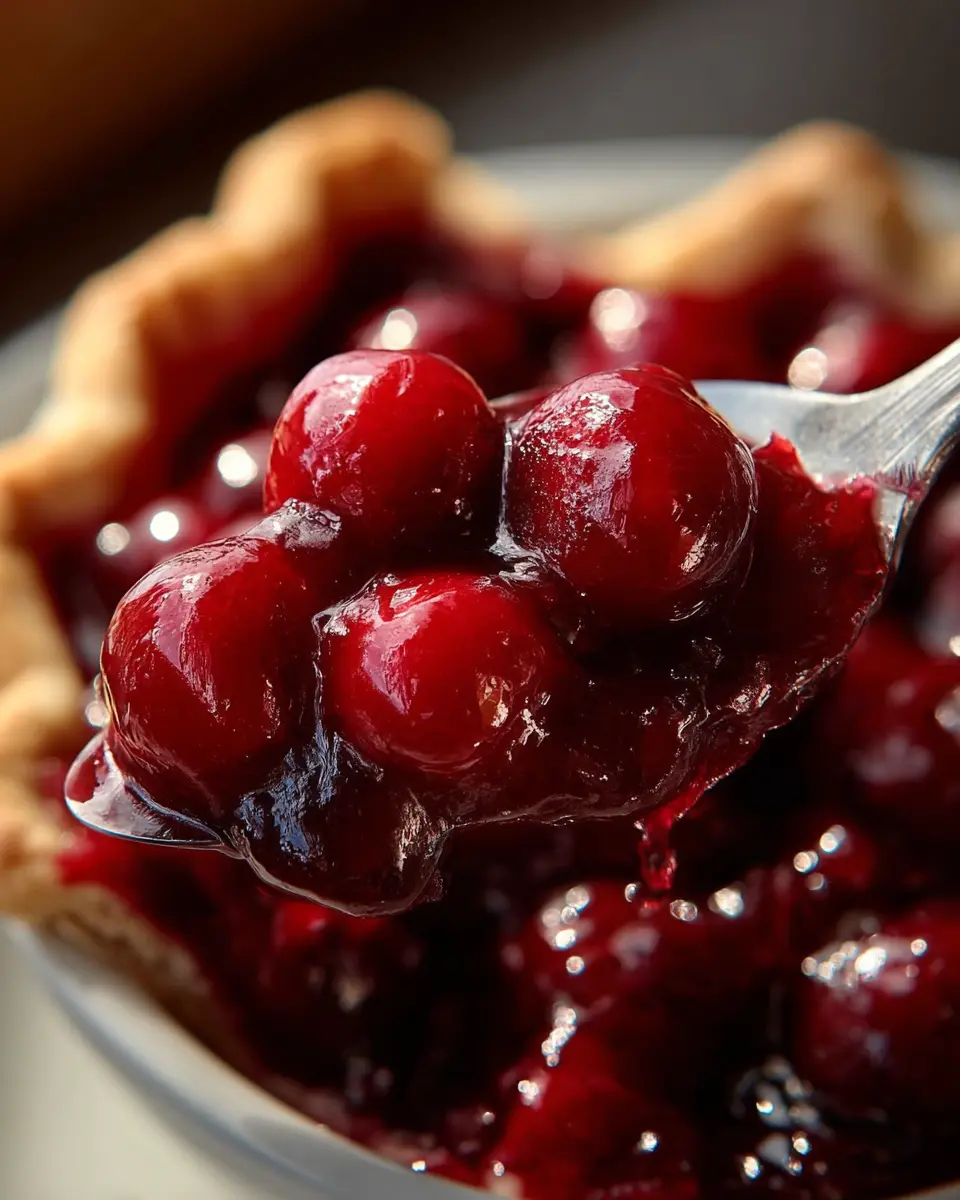
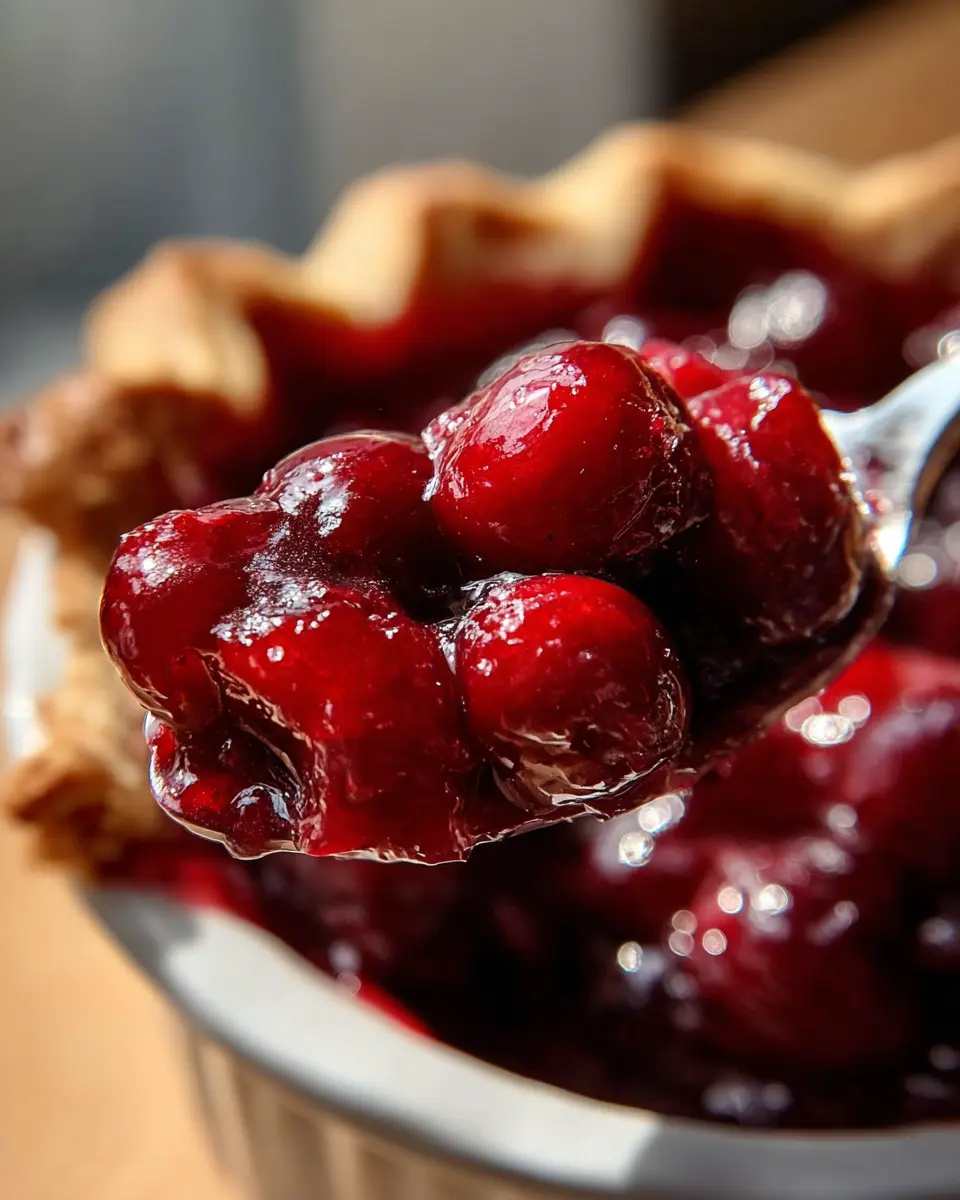
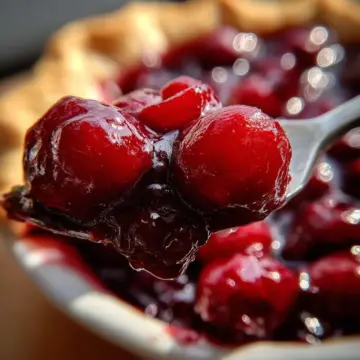
Introduction to Thick and Juicy Homemade Cherry Pie Filling
Why make your own cherry pie filling?
When it comes to desserts, there’s something incredibly satisfying about crafting your own thick and juicy homemade cherry pie filling. Imagine biting into a slice of warm cherry pie with the perfect balance of sweet and tart flavors, knowing that you made it from scratch! Not only does homemade filling allow for customization—adjusting sweetness or adding spices like almond extract—but it also guarantees fresh ingredients without preservatives.
Using fresh or frozen cherries, you can create a luscious filling that elevates your pies, cheesecakes, or even pancakes. According to a study by the National Cherry Growers Association, cherries are packed with antioxidants and anti-inflammatory properties, making them not just delicious but good for you too!
Plus, the process can be a delightful way to spend a weekend afternoon. Whether you’re baking for a holiday gathering or simply treating yourself, having a jar of homemade cherry filling on hand offers a joyful shortcut to dessert satisfaction. If you’re curious about other fruit fillings, you can explore recipes for strawberry or blueberry fillings as well.
So, roll up your sleeves and get ready to delve into the delightful world of cherry pie filling! Your taste buds will thank you.

Ingredients for Thick and Juicy Homemade Cherry Pie Filling
Creating a thick and juicy homemade cherry pie filling is simpler than you think! Let’s dive into the essential ingredients you'll need to make this delicious treat. You can use either fresh or frozen cherries, making this recipe versatile and perfect for any season.
Necessary Ingredients
-
Sweet Cherries: 4 cups, pitted. These are the sweet gems that will provide a lovely base for your filling, bringing that delightful sweetness.
-
Tart Cherries: 1 cup, pitted (if you’re using only sweet cherries, add ¼ cup lemon juice). Tart cherries balance the sweetness and add a delicious zing.
-
Granulated Sugar: 1 cup. This enhances the natural sweetness of the cherries while balancing the tartness.
-
Water: ½ cup. A little liquid helps dissolve the sugar and starts releasing the cherry juices.
-
Lemon Juice: 2 tablespoons. Freshly squeezed lemon juice brightens up the flavors, making your filling vibrant.
-
Cornstarch: ¼ cup. This is your thickening agent. It gives the pie filling that luscious, scoopable texture.
-
Almond Extract: ¼ teaspoon (optional). For an extra layer of flavor, this is totally worth trying!
Using high-quality ingredients will make your pie filling stand out. So, gather these items, and let’s make some cherry magic! If you're looking for cherry varieties, check out this guide to ensure you're picking the best.
Step-by-step Preparation for Thick and Juicy Homemade Cherry Pie Filling
Creating a thick and juicy homemade cherry pie filling is easier than you might think! With just a few steps, you can enjoy a sweet-tart filling that elevates any dessert. Let’s dive into the process, ensuring you have a delicious filling ready in no time.
Gather and prepare your ingredients
Before you start cooking, it’s essential to gather all your ingredients. This not only speeds up the cooking process but also makes it less stressful!
- Fresh or frozen cherries: You’ll need 4 cups of sweet cherries and 1 cup of tart cherries. If you can't find tart cherries, increasing the lemon juice in sweet ones adds that needed tartness.
- Sweeteners: Have 1 cup of granulated sugar on hand to balance the flavors.
- Water and lemon juice: You’ll need ½ cup of water and 2 tablespoons of lemon juice for that zesty lift.
- Thickening agent: Cornstarch is your friend here—¼ cup will do the trick.
- Almond extract: Just a hint (¼ teaspoon) for a lovely depth of flavor, but this is optional.
Once everything is ready, you can move on to the fun part!
Combine cherries, sugar, water, and lemon juice
In a medium saucepan, combine the pitted cherries, sugar, water, and lemon juice. Place it over medium heat. Bring the mixture to a simmer while stirring occasionally to dissolve the sugar and let the cherries release their delicious juices. This process should take about 5 minutes. Have you ever wondered why lemon juice is such a common ingredient in fruit fillings? It enhances flavors and helps prevent browning.
Create the cornstarch slurry
In a small bowl, whisk together the cornstarch with ¼ cup of cold water until smooth. This creates what’s called a slurry, which will help thicken your cherry filling. Make sure there are no lumps; nobody wants a chunky filling when they’re aiming for smooth and luscious!
Thicken the cherry mixture
Now, it's time to get your thick and juicy homemade cherry pie filling to the perfect consistency. Slowly pour the cornstarch slurry into your simmering cherry mixture while gently stirring. Keep stirring until the mixture thickens, which should take about 2 to 4 minutes. A good rule of thumb? Look for slow bubbling and a texture that coats the back of a spoon beautifully.
Add almond extract and cool the filling
Once thickened, remove your saucepan from the heat. If you opted for almond extract, stir this in now to give your filling that subtle, nutty flavor that pairs so well with cherries. Allow the cherry filling to cool completely before using it in any dessert. Cooling is crucial as it helps the filling set properly, making it easier to work with when baking.
There you have it! With these simple steps, you've created a delightful cherry pie filling that can be used in various desserts. Whether in a classic pie or over a cream cheese layer in a cheesecake, your thick and juicy homemade cherry pie filling will impress everyone who takes a bite. If you're interested in canning, check out resources on USDA guidelines for safe home canning to make your delicious filling shelf-stable for future treats. Happy baking!
Variations on Thick and Juicy Homemade Cherry Pie Filling
Using Different Types of Cherries
The beauty of thick and juicy homemade cherry pie filling lies in its adaptability. Feel free to mix sweet and tart cherries for a delightful balance of flavors. For more adventurous bakers, consider using unique varieties like Rainier or Bing cherries. The result will be a pie filling bursting with character and sweetness, setting your dessert apart.
Incorporating Spices for Added Flavor
Want to elevate your thick and juicy homemade cherry pie filling? Try adding spices like cinnamon, nutmeg, or even a pinch of allspice. These can enhance the filling's depth, creating a warm, comforting note that complements the cherries beautifully. Don’t hesitate to experiment; you might find your new favorite flavor combination! For more tips on flavor pairings, check out America's Test Kitchen.
Cooking Tips and Notes for Thick and Juicy Homemade Cherry Pie Filling
When it comes to crafting the thick and juicy homemade cherry pie filling, paying attention to a few key details can elevate your dessert game. Here are some tips to ensure your filling reaches its full potential.
-
Fresh vs. Frozen: If using frozen cherries, add them directly to the saucepan without thawing. This will help maintain the integrity of their juicy goodness.
-
Sweet and Tart Balance: Combining sweet and tart cherries gives you the best flavor. If you're unable to find tart cherries, a splash of lemon juice will do wonders.
-
Cornstarch Consistency: For a thicker filling, consider increasing the cornstarch to 5 tablespoons. Your pie will boast a luscious texture that’s simply irresistible.
Remember, letting your filling cool completely before using it allows the flavors to meld beautifully!
Serving Suggestions for Thick and Juicy Homemade Cherry Pie Filling
When it comes to your delicious thick and juicy homemade cherry pie filling, versatility is key! Here are some delectable ideas to make the most out of this sweet concoction:
-
Classic Cherry Pie: Use it as the star ingredient in your homemade pie. A flaky crust perfectly complements this filling, creating the ultimate dessert.
-
Cherry Cheesecake: Top a creamy cheesecake with your cherry filling for an unforgettable twist. The tart cherries beautifully balance the richness of the cheesecake.
-
Ice Cream Topping: Drizzle it over vanilla or chocolate ice cream for an easy yet elegant dessert. The warm filling contrasts beautifully with the cold ice cream.
-
Pancake or Waffle Topping: Brighten up your brunch by adding this luscious filling to pancakes or waffles. It’s an instant upgrade that will impress your guests.
Explore these options and let your creativity shine! Our thick and juicy cherry filling can elevate any dish. For more cherry inspiration, visit The Cherry Marketing Institute.
Time Breakdown for Thick and Juicy Homemade Cherry Pie Filling
Preparation time
Getting started on your thick and juicy homemade cherry pie filling takes about 10 minutes. This includes pitting and measuring your cherries, along with gathering your ingredients.
Cooking time
The actual cooking process is quick and straightforward, lasting around 15 minutes. In this time, you'll transform your cherries into a delectable filling that perfects any dessert.
Total time
In total, you're looking at around 25 minutes from start to finish. It's a perfect weekend project, ensuring you have a delicious cherry filling ready for your favorite pie or dessert in no time!
If you're curious about more dessert ideas, check out this article for inspiration!
Nutritional Facts for Thick and Juicy Homemade Cherry Pie Filling
Calories
Each serving of our thick and juicy homemade cherry pie filling contains approximately 210 calories. This makes it a delightful treat for special occasions without overly compromising your daily caloric intake.
Sugar Content
With 35 grams of sugar per serving, this filling is indeed sweet, thanks to the natural sugars found in cherries and the added granulated sugar. It’s important to savor each bite while being mindful of your overall sugar intake.
Carbohydrates
If you're counting carbs, be aware that this cherry pie filling has about 54 grams of carbohydrates per serving. Most of these carbs come from the cherries and sugar, which offer a satisfying energy boost while indulging in your favorite dessert.
For more detailed health benefits of cherries, you might want to check out the Healthline Cherry Benefits article. Enjoy your homemade filling responsibly!
FAQs about Thick and Juicy Homemade Cherry Pie Filling
Can I use frozen cherries for this recipe?
Absolutely! Frozen cherries can work beautifully in your thick and juicy homemade cherry pie filling. Just remember to add them directly to the saucepan without thawing. This keeps their juices intact and helps achieve that perfect consistency.
How long can I store the filling?
You can store your cherry filling in the refrigerator for up to a week, keeping it in an airtight container. If you want to savor it for longer, consider canning it using standard water bath methods. It’s a great way to enjoy that homemade goodness throughout the year!
What dishes can I use this filling with?
This thick and juicy homemade cherry pie filling is incredibly versatile! Use it in a classic pie, as a cheesecake topping, or even spooned over vanilla ice cream for a delightful dessert. You can also incorporate it into breakfast dishes like pancakes or yogurt parfaits. The possibilities are endless!
For more ideas, check out this post on cherry dessert recipes.
Conclusion on Thick and Juicy Homemade Cherry Pie Filling
In conclusion, this thick and juicy homemade cherry pie filling is a delightful addition to your dessert repertoire. Easy to make and bursting with flavor, it’s perfect for pies, cheesecakes, or simply serving over ice cream. Let your creativity shine with this versatile recipe, and enjoy the satisfying experience of making it from scratch!
Thick and Juicy Homemade Cherry Pie Filling
Equipment
- medium saucepan
- Small bowl
- whisk
Ingredients
Cherries
- 4 cups sweet cherries, pitted fresh or frozen
- 1 cup tart cherries, pitted fresh or frozen, if using only sweet cherries, add ¼ cup lemon juice
Other ingredients
- 1 cup granulated sugar
- ½ cup water
- 2 tablespoons lemon juice
- ¼ cup cornstarch
- ¼ teaspoon almond extract optional
Instructions
Cooking Steps
- Combine the pitted cherries, sugar, water, and lemon juice in a medium saucepan.
- Bring the mixture to a simmer over medium heat, stirring occasionally until the sugar dissolves and the cherries release some juice, about 5 minutes.
- In a small bowl, whisk the cornstarch with ¼ cup of cold water until smooth to create a slurry.
- Slowly pour the cornstarch slurry into the simmering cherry mixture while stirring constantly.
- Continue to cook, stirring constantly, until the filling thickens significantly, about 2 to 4 minutes.
- Remove the saucepan from the heat. Stir in the almond extract, if using.
- Allow the filling to cool completely before using it in your pie crust or dessert.
Leave a Reply