
Introduction to Black Forest Ice Cream Cake
What is Black Forest Ice Cream Cake?
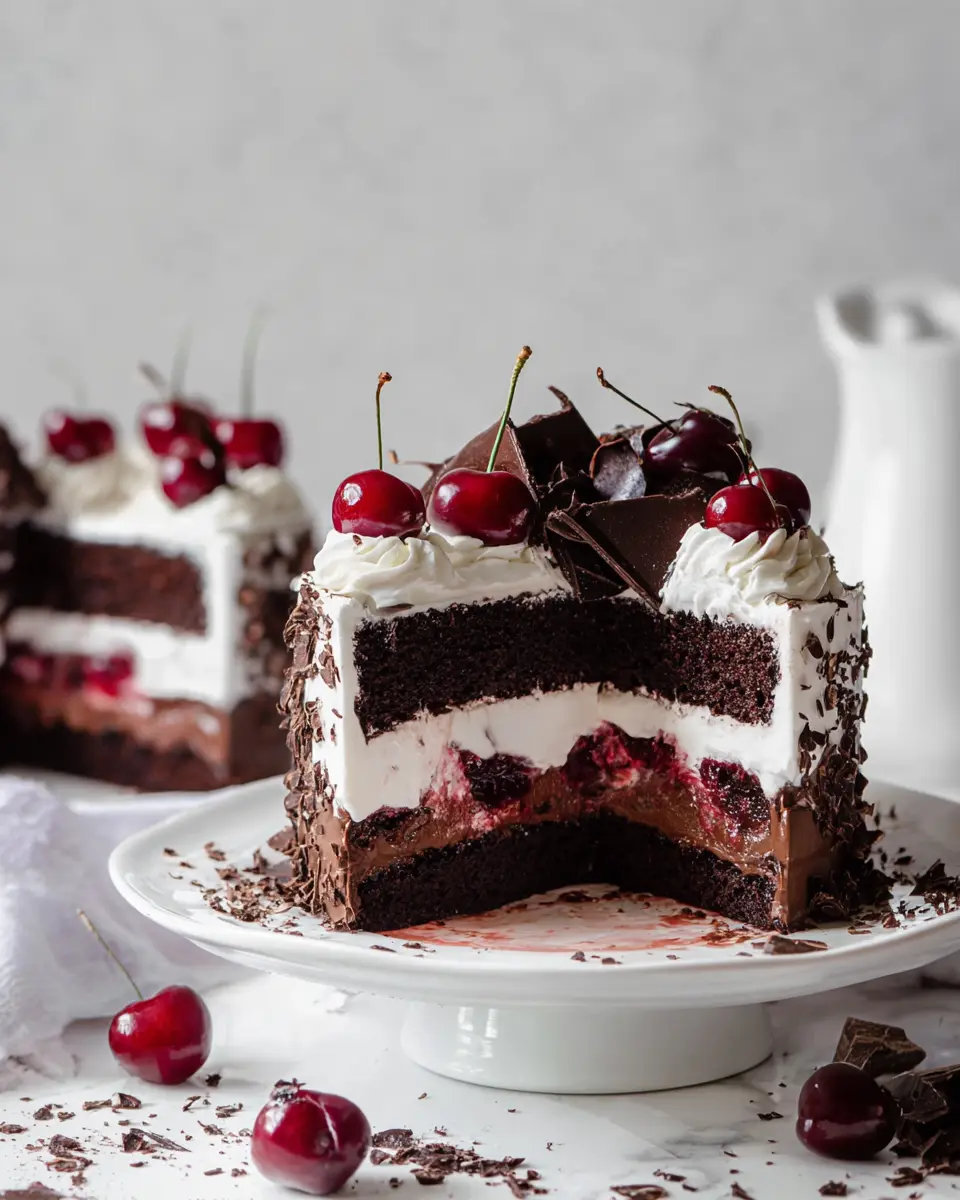
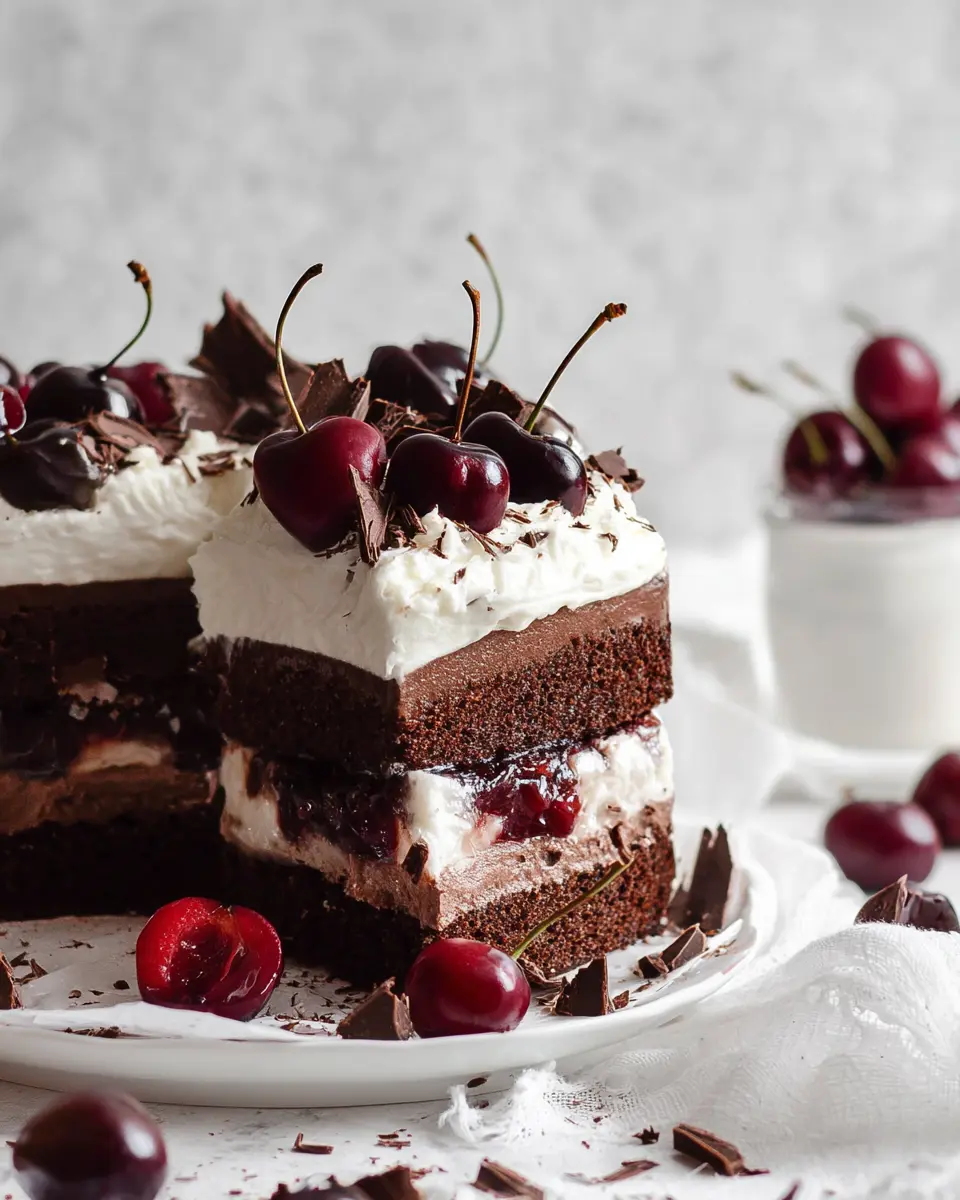
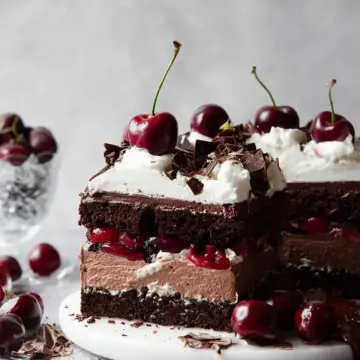
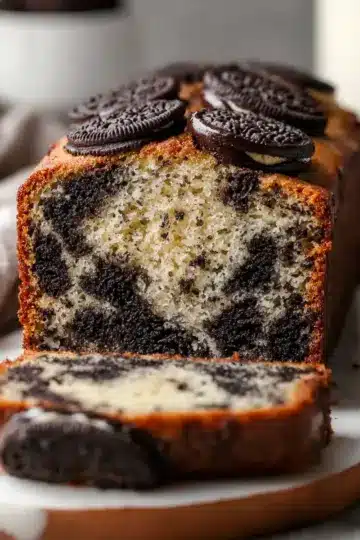
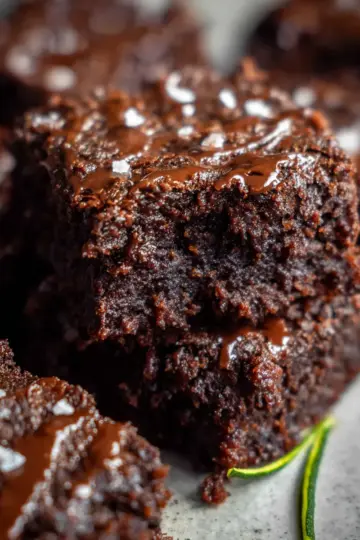
Soothing, decadent, and utterly delightful, the Black Forest Ice Cream Cake combines rich, fudgy brownies with layers of cherry sauce, homemade vanilla ice cream, and dark chocolate ganache. This layered indulgence not only pays homage to traditional German Black Forest Cake but also adds a refreshing twist, making it the perfect dessert for any occasion. Imagine a sumptuous brownie base paired with a luscious cherry filling and topped with cold ice cream—it’s a dessert lover's dream come true!
Why You Should Try Making It at Home
Have you ever craved a dessert that's as stunning to look at as it is delicious? Making a Black Forest Ice Cream Cake at home allows you to customize ingredients and flavors to match your taste preferences. Plus, you’ll impress friends and family with your baking skills!
Homemade desserts use fresher ingredients and can be healthier without the preservatives found in store-bought versions. And let’s be honest—there’s nothing quite like slicing into a cake that you’ve crafted with your own two hands.
If you're curious about adding a special touch to your next gathering, this recipe is not just a treat; it’s an experience! For more ideas on elevating your dessert game, check out your favorite baking blogs like Sally's Baking Addiction or Handle the Heat.
Dive in and discover the joy of creating your very own Black Forest Ice Cream Cake!
Ingredients for Black Forest Ice Cream Cake
Creating the delightful Black Forest ice cream cake involves several layers of flavor, each requiring its own unique ingredients. Let’s break them down for simplicity!
Essential Ingredients for the Cherry Sauce
The cherry sauce is crucial for that authentic Black Forest flavor. For this layer, you'll need:
- 1 cup of cherries (fresh or frozen)
- 2 tablespoons of granulated sugar
- 1 tablespoon of cornstarch
- 2 tablespoons of water
- 1 tablespoon of Kirsch for a touch of authenticity
This sweet and slightly tart sauce will elevate your cake.
Ingredients for the Brownie Layer
Next up is the brownie layer, where fudginess reigns. Gather the following items:
- ½ cup of unsalted butter (melted)
- ¾ cup of light brown sugar
- ½ cup of granulated sugar
- 2 large eggs (room temperature)
- 2 tablespoons of Kirsch
- 1 teaspoon of vanilla extract
- ¾ cup of unsweetened cocoa powder
- ⅓ cup of all-purpose flour
- ½ teaspoon of espresso powder (optional but recommended)
- ¼ teaspoon of kosher salt
These ingredients come together for a decadent base layer.
Components of the Chocolate Ganache and Toppings
Finally, let’s not forget the glossy chocolate ganache and toppings! You'll need:
- 4 ounces of dark chocolate (chopped)
- ½ cup of heavy cream
To finish, don’t forget:
- 3 cups of vanilla ice cream
- A handful of fresh cherries for garnish
- Some chocolate shavings to add that final touch of elegance
By merging these layers, you’ll create a stunning and delicious centerpiece for any occasion. Ready to impress your friends? Let's get started!
For more sweet treats, check out King Arthur Baking for tips on baking the perfect brownie.
Step-by-step preparation of Black Forest Ice Cream Cake
Creating a delightful Black Forest Ice Cream Cake at home is both fun and rewarding. From the rich brownie layer to the luscious chocolate ganache, each step is an opportunity to engage your senses and indulge your love for desserts. Let's dive into the preparation process!
Making the cherry sauce
The first step to crafting your decadent cake is to prepare the cherry sauce. You'll want to add 1 cup of cherries (fresh or frozen) to a large pot along with 2 tablespoons of granulated sugar. Heat the mixture over medium heat, allowing the cherries to break down and become syrupy, which usually takes about 5 minutes.
Next, dissolve 1 tablespoon of cornstarch in 2 tablespoons of water and stir this into the cherry mixture to thicken it. Once thickened, mix in 1 tablespoon of Kirsch for that classic Black Forest flavor. Allow it to cool completely before using, as it makes a delightful topping for your brownie layer.
Preparing the brownie layer
While your cherry mixture cools, it’s time to focus on the brownie layer. Preheat your oven to 350°F and line your cake pan with parchment paper. In a large bowl, whisk together ½ cup of melted unsalted butter, ¾ cup of light brown sugar, and ½ cup of granulated sugar until combined. Add 2 large eggs, one at a time, whisking after each addition. Toss in 2 tablespoons of Kirsch and 1 teaspoon of vanilla extract, mixing until smooth.
Then gently fold in ¾ cup of unsweetened cocoa powder, ⅓ cup of all-purpose flour, ½ teaspoon of espresso powder (if using), and ¼ teaspoon of kosher salt. Pour the batter into your prepared pan and bake for 25-35 minutes, or until a knife inserted comes out mostly clean. Let it cool completely in the pan.
Crafting the chocolate ganache
Once your brownie layer is completely cooled, it's ganache time! Place 4 ounces of chopped dark chocolate in a mixing bowl. Heat ½ cup of heavy cream in a microwave until hot, but not boiling (about 1-2 minutes). Pour the hot cream over the chocolate, letting it sit for about two minutes, and then mix until smooth. Allow the ganache to cool slightly before using.
Assembling the ice cream layer
Now, let’s create that fabulous ice cream layer. Line a second 6-inch round cake pan with plastic wrap. Scoop about 3 cups of slightly softened vanilla ice cream into the pan, pressing it down to form an even layer. Cover and let this freeze for at least 2 hours; overnight is even better for a perfect Black Forest Ice Cream Cake.
Putting it all together and freezing
With everything ready, it’s finally assembly time! First, spread your cooled cherry sauce evenly over the cooled brownie layer. Next, remove the ice cream layer from the pan and place it on top of the cherry layer.
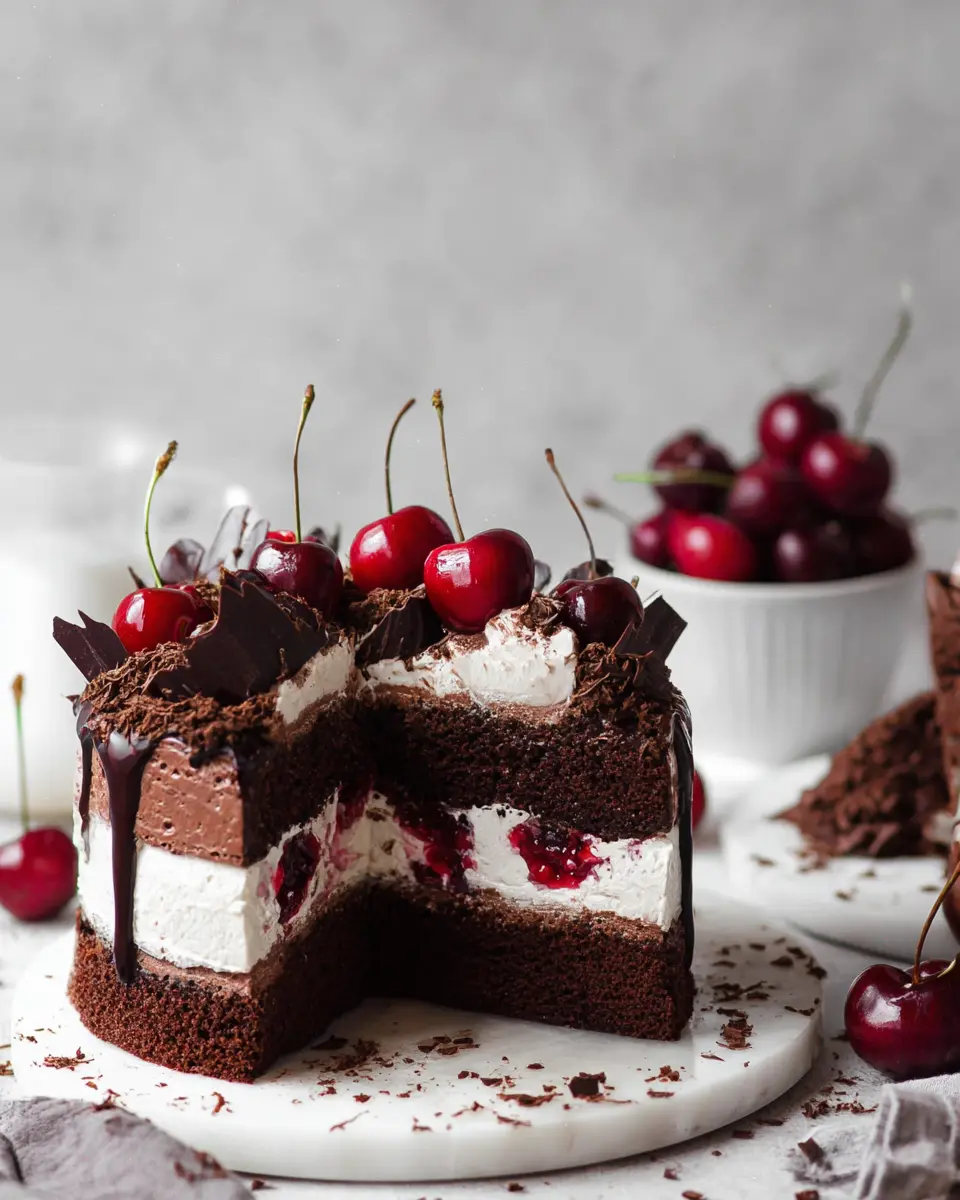
Drizzle your prepared chocolate ganache over the ice cream layer, gently pushing it down the sides for that beautiful drip effect. Place the assembled cake back in the freezer for at least 30 minutes before finishing with fresh cherries and chocolate shavings.
And there you have it! A stunning and delicious Black Forest Ice Cream Cake that’s sure to impress anyone who takes a slice. Enjoy!
Variations on Black Forest Ice Cream Cake
Alternate Fruits for the Sauce
While cherries are the classic choice for your black forest ice cream cake, you can mix things up with other fruits. Try using raspberries or strawberries for a fresh twist. Blueberries can add a lovely pop of color, while peaches offer a juicy sweetness. Consider creating a mixed berry sauce for a vibrant alternative—just adjust sugar depending on fruit tartness!
For more fruit sauce ideas, check out this article on fruit desserts.
Different Ice Cream Flavors to Try
The beauty of a black forest ice cream cake lies in its versatility! Instead of traditional vanilla, consider flavors like rich chocolate, creamy hazelnut, or even refreshing mint chocolate chip. A coffee-flavored ice cream can add an exciting twist, contrasting beautifully with the chocolate brownies and fruity sauce. Don’t shy away from experimenting; the combination of flavors might surprise you!
For a complete guide to ice cream flavors, visit this resource on ice cream variety.
Cooking tips and notes for Black Forest Ice Cream Cake
Tips for perfecting each layer
To achieve a stunning Black Forest ice cream cake, focus on these essential tips:
- Brownie Layer: Make sure your butter is fully melted and mixed with sugar for a fudgy texture. Avoid overmixing once you add the flour.
- Cherry Sauce: Let it cool completely before spreading; warm sauce can melt your ice cream. If you prefer a thicker sauce, increase the cornstarch slightly.
- Ice Cream Layer: Allow the ice cream to sit at room temperature for about 10 minutes before pressing it into the pan for easier handling.
Common mistakes to avoid
- Avoid skipping the parchment lining; it prevents sticking and ensures easy removal.
- Don’t rush the cooling time for the brownie layer as it needs to hold its shape. Also, remember to test your ganache; if it’s too hot, it might melt your ice cream.
- Lastly, be cautious with the knife while cutting to ensure clean, beautiful slices.
For more cake layering techniques, check out this helpful guide. Happy baking!
Serving suggestions for Black Forest Ice Cream Cake
Best accompaniments
To elevate your black forest ice cream cake, consider pairing it with a dollop of freshly whipped cream and a sprinkle of dark chocolate shavings. A side of tart cherry compote can enhance those rich chocolate and cherry flavors. If you're feeling adventurous, serve it with a scoop of creamy vanilla gelato for an extra layer of lusciousness.
Presentation ideas for impressing guests
Presentation is key! Serve your black forest ice cream cake on a beautiful cake stand and finish it with an artistic drizzle of chocolate ganache. Garnish with fresh cherries and edible flowers for a pop of color. And don’t forget the charming touch of personalized place cards at each setting to make your guests feel special. This delightful dessert deserves a grand stage! For more tips, check out this guide on dessert presentation.
Time Breakdown for Black Forest Ice Cream Cake
Getting organized is key to the success of your Black Forest Ice Cream Cake. Here’s a quick time breakdown so that you know what to expect while making this delightful dessert:
Preparation Time
Spend about 30 minutes gathering your ingredients and getting everything ready. This includes making the cherry sauce and preparing your brownie layer.
Cooking Time
You'll need approximately 30 minutes for baking the brownie layer. Keep a close eye on it to ensure it doesn’t overbake!
Freezing Time
Patience is essential here, as the cake takes around 5 hours to freeze completely—an ideal time to relax and plan your cake reveal!
You can check out more tips on efficient baking at Food Network. So roll up those sleeves, and let’s turn this into a cake to remember!
Nutritional Facts for Black Forest Ice Cream Cake
Calories per Slice
Each slice of this decadent Black Forest Ice Cream Cake comes in at approximately 375 calories. Perfect for treating yourself without going overboard!
Breakdown of Macronutrients
In every slice, you’ll find:
- Carbohydrates: 45g
- Protein: 5g
- Fat: 21g (with 12g of that being saturated fat)
While indulgent, this cake provides a delightful balance that can fit into an occasional treat in a well-rounded diet. Remember, moderation is key! If you want to dive deeper into nutritional content, sources like USDA Nutrition Center can be a great resource.
FAQ about Black Forest Ice Cream Cake
Can I make it ahead of time?
Absolutely! The Black Forest Ice Cream Cake can be prepared in advance, making it perfect for gatherings. You can assemble and freeze it for up to a week. Just remember to store it properly to maintain its flavor and texture.
What’s the best way to store it?
To keep your cake fresh and delicious, wrap it in plastic wrap or store it in an airtight container. If you don’t have one, multiple layers of plastic wrap will do the trick. Proper storage prevents freezer burn and ensures that every slice is as delightful as the first. Learn more about freezing desserts here!
Can I substitute ingredients for dietary restrictions?
Certainly! For those with dietary restrictions, you can swap out ingredients without sacrificing flavor:
- Use gluten-free flour for the brownie layer.
- Replace granulated sugar with sweeteners like agave or a sugar alternative.
- Opt for dairy-free ice cream to make it vegan-friendly.
Feel free to get creative! Your unique twists can make this dessert fit your dietary needs while keeping it delicious.
Conclusion on Black Forest Ice Cream Cake
In summary, the Black Forest ice cream cake is a delightful dessert that combines rich brownie layers with a refreshing cherry sauce and creamy vanilla ice cream. Perfect for any occasion, it’s a treat your friends and family will love. Don’t forget to share your creations on social media, and enjoy every slice!
Black Forest Ice Cream Cake
Equipment
- two 6x2 inch cake pans
- 6 inch parchment rounds
- parchment paper
- pan spray
- plastic wrap
Ingredients
Cherry Sauce
- 1 cup cherries fresh or frozen
- 2 tablespoons granulated sugar
- 1 tablespoon cornstarch
- 2 tablespoons water
- 1 tablespoon Kirsch
Brownie Layer
- ½ cup unsalted butter melted
- ¾ cup light brown sugar
- ½ cup granulated sugar
- 2 large eggs room temperature
- 2 tablespoons Kirsch
- 1 teaspoon vanilla extract
- ¾ cup unsweetened cocoa powder
- ⅓ cup all purpose flour
- ½ teaspoon espresso powder optional
- ¼ teaspoon kosher salt
Chocolate Ganache
- 4 ounces dark chocolate chopped
- ½ cup heavy cream
Topping
- 3 cups vanilla ice cream
- fresh cherries
- chocolate shavings
Instructions
Cherry Sauce
- Add the cherries and sugar to a large pot.
- Heat over medium heat until the cherries begin to break down and get syrupy.
- Dissolve the cornstarch in water, then add to the cherries and stir until the filling thickens. Then stir in the Kirsch.
- Remove from the heat and let cool completely to room temperature.
Brownie Layer
- Preheat the oven to 350°F and line a 6 inch round cake pan with parchment paper on the bottom and sides.
- In a large bowl, whisk together the melted butter, brown sugar, and granulated sugar.
- Add in the eggs one at a time and whisk each one until fully incorporated and the batter starts to get lighter in color.
- Then add in the Kirsch and vanilla extract and mix until smooth.
- Fold in the cocoa powder, espresso powder, flour, and salt and mix until the batter is just combined.
- Pour the batter into the prepared cake pan.
- Bake at 350°F for 25-35 minutes or until an inserted knife comes out mostly clean.
- Remove from the oven and let fully cool in the pan.
Chocolate Ganache
- Once the cake layers are fully frozen, make the ganache.
- To make the ganache, add the chopped dark chocolate to a large bowl.
- Then place the cream in a microwave safe bowl and microwave for 1-2 minutes or until hot to the touch but not boiling.
- Pour over the chopped chocolate and let sit for about two minutes. Using a spatula, gently mix until the chocolate is fully melted and the ganache is fully combined and smooth.
- Let sit for 10-15 minutes until the ganache is cool to the touch but still pourable.
Assembly
- For the ice cream layer, line a 6 inch round cake pan with plastic wrap. Add about 3 cups slightly softened vanilla ice cream to the pan and press into an even layer. Cover and let ice cream layer freeze for at least 2 hours (overnight is even better).
- After both the brownie layer and cherry compote are cool, spread the cherry filling in an even layer over top of the brownie. Then freeze for 2 hours until set.
- To assemble the cake, place the brownie and cherry layer on a serving plate, then top with a frozen ice cream layer.
- Remove the cake from the freezer and pour the cooled ganache over the top. Use on offset spatula to gently push some of the edges to create the drip effect.
- Place the cake back in the freezer for at least 30 minutes.
- Then top with fresh cherries and chocolate shavings.

Leave a Reply