
Introduction to Marble Dipped Strawberries
The Delightful World of Homemade Treats
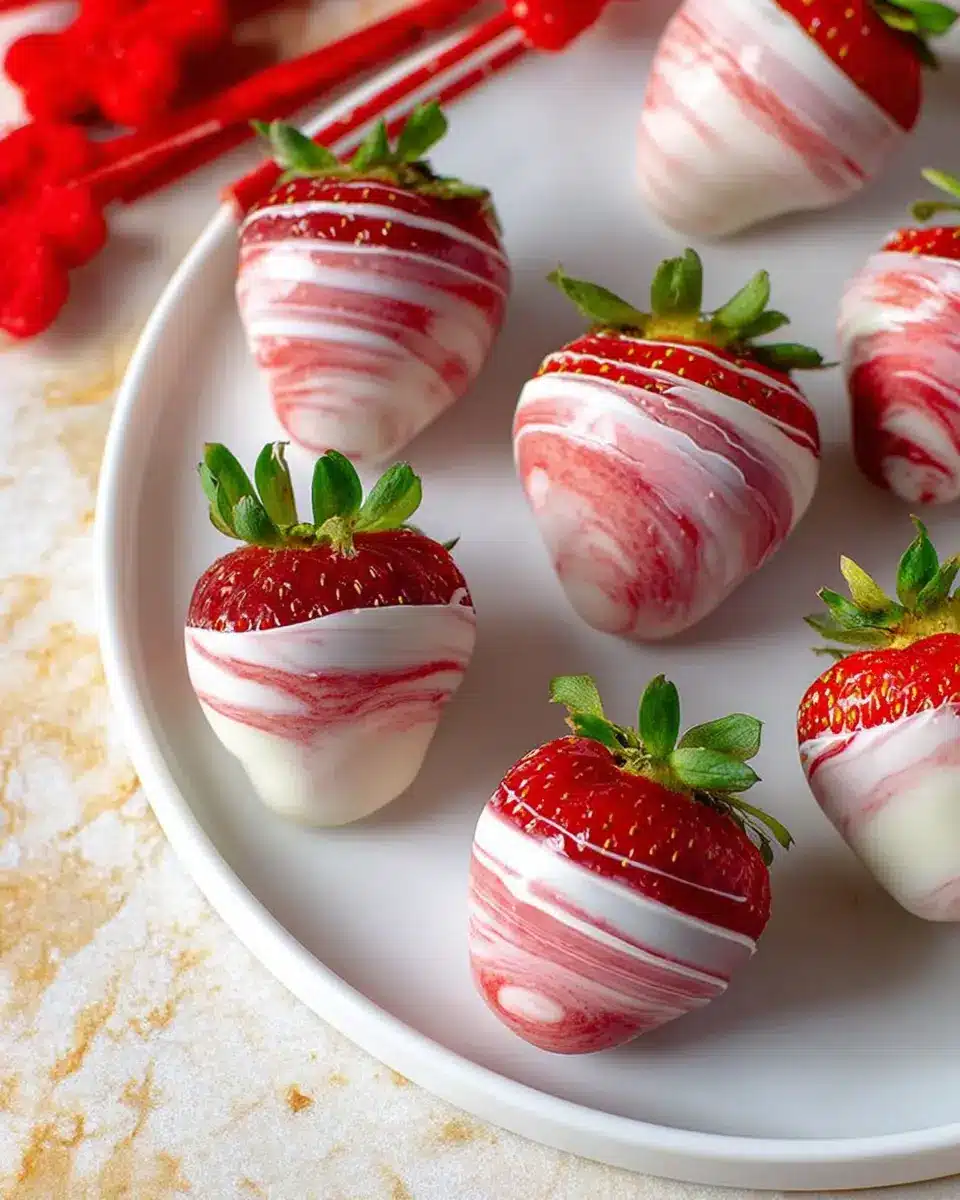
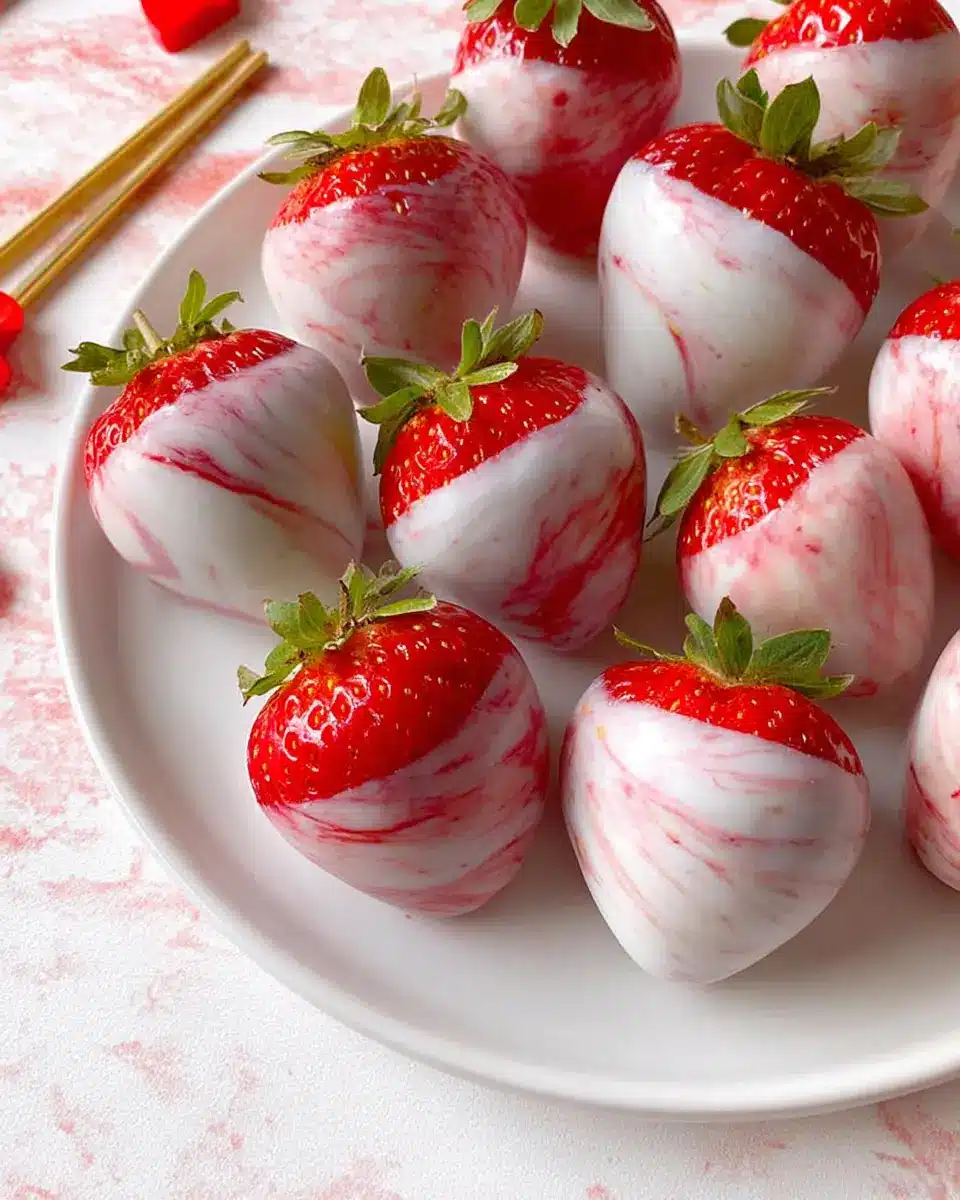
There's something utterly charming about crafting your own sweets in the kitchen, and marble dipped strawberries perfectly embody that joy. Imagine sinking your teeth into succulent strawberries enveloped in a creamy blend of rich white candy melts and a playful swirl of hot pink candy. Every bite is not just a treat for your taste buds but also a feast for the eyes—a true celebration of homemade indulgence.
Making marble dipped strawberries is surprisingly simple, making it an ideal choice for gatherings, date nights, or just a sweet self-care moment. The elegance of the marbling technique adds a creative flair that will impress anyone lucky enough to snag one. If you’re curious about the origins of chocolate-dipped fruit, you’ll find that it dates back to the early 20th century, but why settle for just chocolate when you can introduce vibrant colors into your dessert?
Don’t worry if you’re not a seasoned chef! This recipe walks you through every step, ensuring your batch is as beautiful as it is delicious. So, grab your strawberries and get ready to indulge in a delightful and fun kitchen adventure! For tips on transforming simple ingredients into spectacular treats, check out this guide on food presentation.
Ingredients for Marble Dipped Strawberries
Essential ingredients for marbled perfection
Creating marble dipped strawberries is not only a delightful culinary adventure but also a fun project to share with friends! Here’s what you’ll need to ensure your strawberries shine beautifully with that marbled effect:
-
1 lb strawberries: Make sure they are washed and dried really well. This is crucial, as extra moisture can ruin the coating.
-
1 ½ cups white candy melts: These will serve as the base for your marbling. Melt them according to the package directions for optimal consistency.
-
2-3 tablespoon hot pink candy melts: A beautiful contrast to the white melts, the pink will add a lovely pop of color. Again, melt these as per the instructions for best results.
With these ingredients, you're set to impress at any gathering! If you're curious about additional color options or techniques, check out this guide on melting chocolate tips for even more creative possibilities. Happy dipping!
Preparing Marble Dipped Strawberries
Creating stunning marble dipped strawberries isn’t just a treat for your taste buds; it's also an eye-catching addition to any occasion. Let's dive into the steps you need to master this delightful treat, ensuring your strawberries come out looking as good as they taste!
Gather the freshest strawberries
When it comes to strawberries, freshness is key. Head to your local farmer’s market or grocery store and choose strawberries that are bright red, firm to the touch, and free of any blemishes. Aim for about 1 pound, which should yield around 20-24 berries. Don’t forget to wash them thoroughly and dry them REALLY well to help the candy melts adhere smoothly. Moisture can be a dipping disaster, so make sure they're completely dry!
Melt the candy melts for the perfect dip
Next up, let’s get those candy melts ready. You’ll need 1 ½ cups of white candy melts. Melt them according to the package directions, making sure they reach a smooth, pourable consistency. If you encounter any lumps or if your melts aren’t cooperating, just add ¼ teaspoon of canola or coconut oil per ¼ cup of candy melts and stir vigorously until smooth. For a pop of color, you’ll also want to melt 2-3 tablespoons of hot pink candy melts!
Create the marble effect
To achieve that gorgeous marble effect that makes these strawberries really special, you'll want to create a swirling mixture. In a small microwave-safe bowl, melt about ¾ cup of white candy melts. Drizzle in 1-2 teaspoons of your pink candy melts on top for that stunning swirl. The more drizzling, the more pronounced the marble dipped strawberries effect will be!
Dip and swirl the strawberries
Now comes the fun part! Secure a skewer in the top of each strawberry. One by one, dip each strawberry into the candy melts, slowly turning it 360 degrees to create the swirl effect. It’s a bit like giving your strawberry a little dance! Once dipped, gently tap the skewer to let any excess chocolate drip off. Then, lay the strawberry on a wax paper-lined baking sheet. Repeat this process for all of your berries, and if your candy begins to look too pink, just start fresh with a new bowl.
Allow to set and enjoy!
Finally, your marble dipped strawberries need some time to set. Allow them to cool for about 30 minutes before indulging in these sweet creations. If you have leftovers (which might be a challenge!), store them in the fridge. The joy is in the details, so take a moment to admire your beautiful creations before devouring them!
With just a few simple steps, you can create these stunning and delicious treats that are sure to impress at your next gathering! Happy dipping!
Variations on Marble Dipped Strawberries
Colorful Candy Melt Combinations
Elevate your marble dipped strawberries by experimenting with different candy melt colors! Think outside the typical pink and white. You could try vibrant purple and turquoise for a whimsical twist, or go with holiday hues like red and green for festive occasions. The possibilities are nearly endless! Just make sure to melt your candy according to package instructions to achieve that perfect, pourable consistency. For guidance on melting candy melts, you may want to check out this article for some tips.
Add Toppings for Extra Crunch
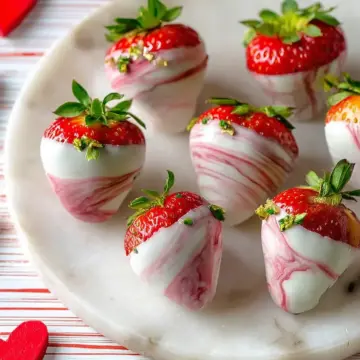
For a delicious crunch to contrast the sweetness, consider adding toppings. Crushed nuts, sprinkles, or shredded coconut can add that extra layer of texture that makes your marble dipped strawberries truly special. Simply sprinkle your chosen toppings while the melted candy is still warm; this ensures they stick perfectly! Not only do these toppings add flavor, but they also make your strawberries visually appealing—perfect for impressing guests at your next gathering!
Cooking Tips and Notes for Marble Dipped Strawberries
Ensuring Candy Melts Are Smooth
Achieving that gorgeous marbling effect for your marble dipped strawberries begins with smooth candy melts. If you notice your melts looking a bit chunky, don't fret! Just add a tiny bit of canola or coconut oil — about ¼ teaspoon per ¼ cup of melts. This will help achieve that dreamy, pourable consistency. For more tips on melting chocolate and candy, check out this resource.
Working with Smaller Batches
To ensure your marbling stays vibrant, work in smaller batches. After coating a few berries, if you notice the pink color getting too dominant, start fresh with a clean bowl. This method keeps your marble dipped strawberries looking stunning and delicious. Plus, it’s way easier to control the consistency! Remember, it's all about creating that perfect swirl to impress your friends at the next gathering.
Serving suggestions for Marble Dipped Strawberries
Perfect pairings for any occasion
Marble dipped strawberries are a delightful treat that pairs well with various snacks and beverages. For a sweet twist, serve them alongside fluffy mini pancakes drizzled with maple syrup. Prefer a savory contrast? Consider offering turkey bacon bites or chicken ham sliders for that balance of flavors. For drinks, think about refreshing herbal iced teas or zesty sparkling lemonade—both will complement the vibrant taste of your strawberries and add a celebratory touch!
Creative plating ideas
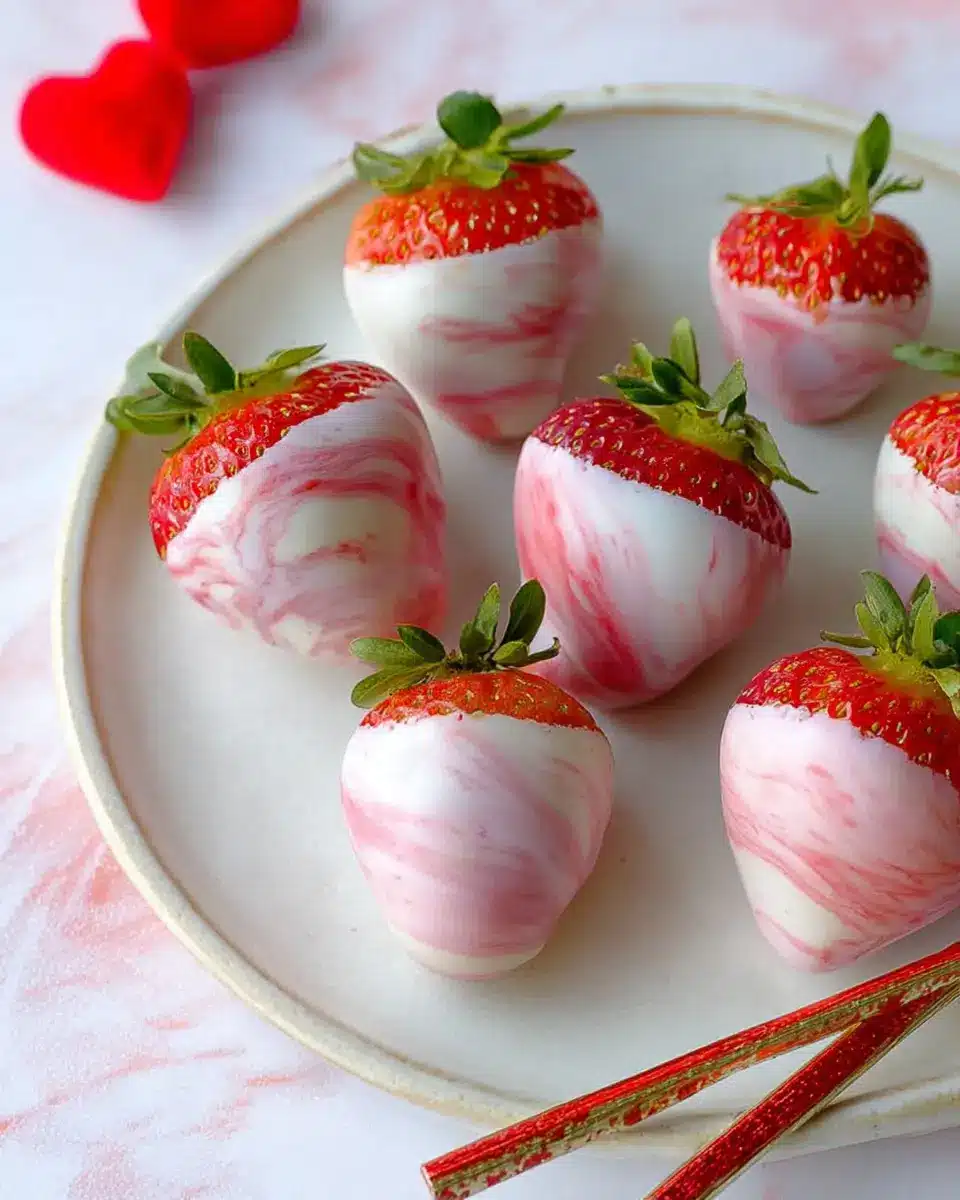
When it comes to presentation, think outside the box! Arrange your marble dipped strawberries in a whimsical manner on a tiered cake stand for an eye-catching display. Scatter some edible flowers around the base for a pop of color, or serve them on a sleek white platter with a chocolate drizzle for an elegant touch. For a fun twist, consider using small mason jars to create individual servings layered with whipped cream and crushed nuts. These are not only visually stunning but also perfect for gatherings or as DIY treats for friends!
Time breakdown for Marble Dipped Strawberries
Preparation time
Getting everything ready for your marble dipped strawberries takes about 15 minutes. This includes washing and drying your strawberries and melting the candy melts.
Setting time
Once you've dipped your strawberries, they’ll need about 30 minutes to set properly. Patience is key here!
Total time
In total, you're looking at roughly 45 minutes from start to finish. A delicious, quick treat to impress your friends or indulge yourself!
If you're curious about shorter preparation tips or want to learn more fun variations, check out this guide on strawberry preparation for insights that will make your berry game even stronger! Enjoy your marble dipped strawberries!
Nutritional Facts for Marble Dipped Strawberries
Calories
Each serving of marble dipped strawberries contains approximately 70 calories. This makes them an enjoyable treat without completely derailing your healthy eating habits, allowing you to satisfy that sweet tooth guilt-free.
Sugars
These delightful strawberries come with about 10 grams of sugar per serving, primarily from the candy melts. While not overly excessive, it’s good to savor them in moderation, especially if you're watching your sugar intake.
Vitamins
Marble dipped strawberries are packed with essential vitamins! The strawberries themselves provide a healthy dose of Vitamin C and antioxidants, which can support your immune system and overall health. For more on the benefits of strawberries, you can check out the Nutritional Information from the USDA.
With these figures, you can indulge in these colorful treats and feel great doing it! Plus, they’re perfect for gatherings or just a fun afternoon snack. Don't forget to enjoy them fresh!
FAQs about Marble Dipped Strawberries
How can I ensure my strawberries are perfectly dipped?
To achieve beautifully coated marble dipped strawberries, start with dry strawberries. Excess moisture can cause the candy melts to clump. Secure a skewer in the top of each berry, and dip slowly while rotating for an even coat. For an amazing marbled effect, drizzle pink candy melts atop the white before dipping.
What if my candy melts aren't melting properly?
If your candy melts aren’t reaching that smooth, pourable consistency, add a splash of canola or vegetable oil—about ¼ teaspoon per ¼ cup of melts. Mix until you achieve that silky texture. Alternatively, check out this handy guide on melting chocolate for more tips.
Can I use fresh fruit other than strawberries?
Absolutely! While this recipe focuses on strawberries, you can experiment with other fruits like bananas, apple slices, or even pineapple chunks. Just remember, the fruit should be firm to hold up during dipping and marbling. It’s a fun way to explore vibrant flavors!
Conclusion on Marble Dipped Strawberries
Creating marble dipped strawberries is not just about indulging your sweet tooth; it’s a delightful exploration of flavors and aesthetics. Crafting these treats at home adds a personal touch, making any occasion feel special. So gather your ingredients, unleash your creativity, and enjoy the joy of homemade treats!
The Joy of Creating Homemade Treats
There's something truly satisfying about whipping up sweet delights in your own kitchen. Not only do you customize flavors and colors according to your preference, but the process can also be a fun bonding experience with friends or family. Picture this: a friends’ night in, music playing, and laughter filling the air as you all dip strawberries into colorful candy melts.
Besides being a treat that’s visually stunning, these marble dipped strawberries are also an opportunity to get creative. Experiment with different color combinations or even add sprinkles for a burst of texture. The possibilities are endless!
Making these strawberries also allows for personal touches. Perhaps you’ll find joy in gifting them to loved ones, or maybe they’ll become the star of your next gathering. Whichever the case, the act of creating homemade treats is one that brings not just joy, but delicious sweetness.
To learn more about the benefits of homemade snacks, check out this article by Food Network on why creating in the kitchen can be so rewarding. Happy dipping!
Marble Dipped Strawberries
Equipment
- microwave-safe bowl
- ramekin
- skewer
- baking sheet
- wax paper
Ingredients
Berry Ingredients
- 1 lb strawberries washed and dried REALLY well
- 1.5 cups white candy melts melted according to package directions
- 2-3 tablespoon hot pink candy melts melted according to package directions
Instructions
Preparation
- Melt ¾ cup white candy melts in a small microwave safe bowl. Drizzle 1-2 teaspoon pink candy melts on top of the white in a random swirl pattern. The more drizzle, the more marbling effect.
- Secure a skewer into the top of the strawberry. Working one at a time, dip the strawberry into the candy melts, and slowly turn the strawberry 360 degrees in the melts to create the swirl pattern. Gently tap the skewer over the edge of the bowl to let any excess candy drop off.
- Place strawberry on a wax paper lined baking sheet. Repeat with remaining berries. If the candy melts get too saturated with pink, start over with a clean ramekin and the remaining white/pink candy melts. Allow to set for 30 mins before serving. Store any leftovers in the fridge.


Leave a Reply